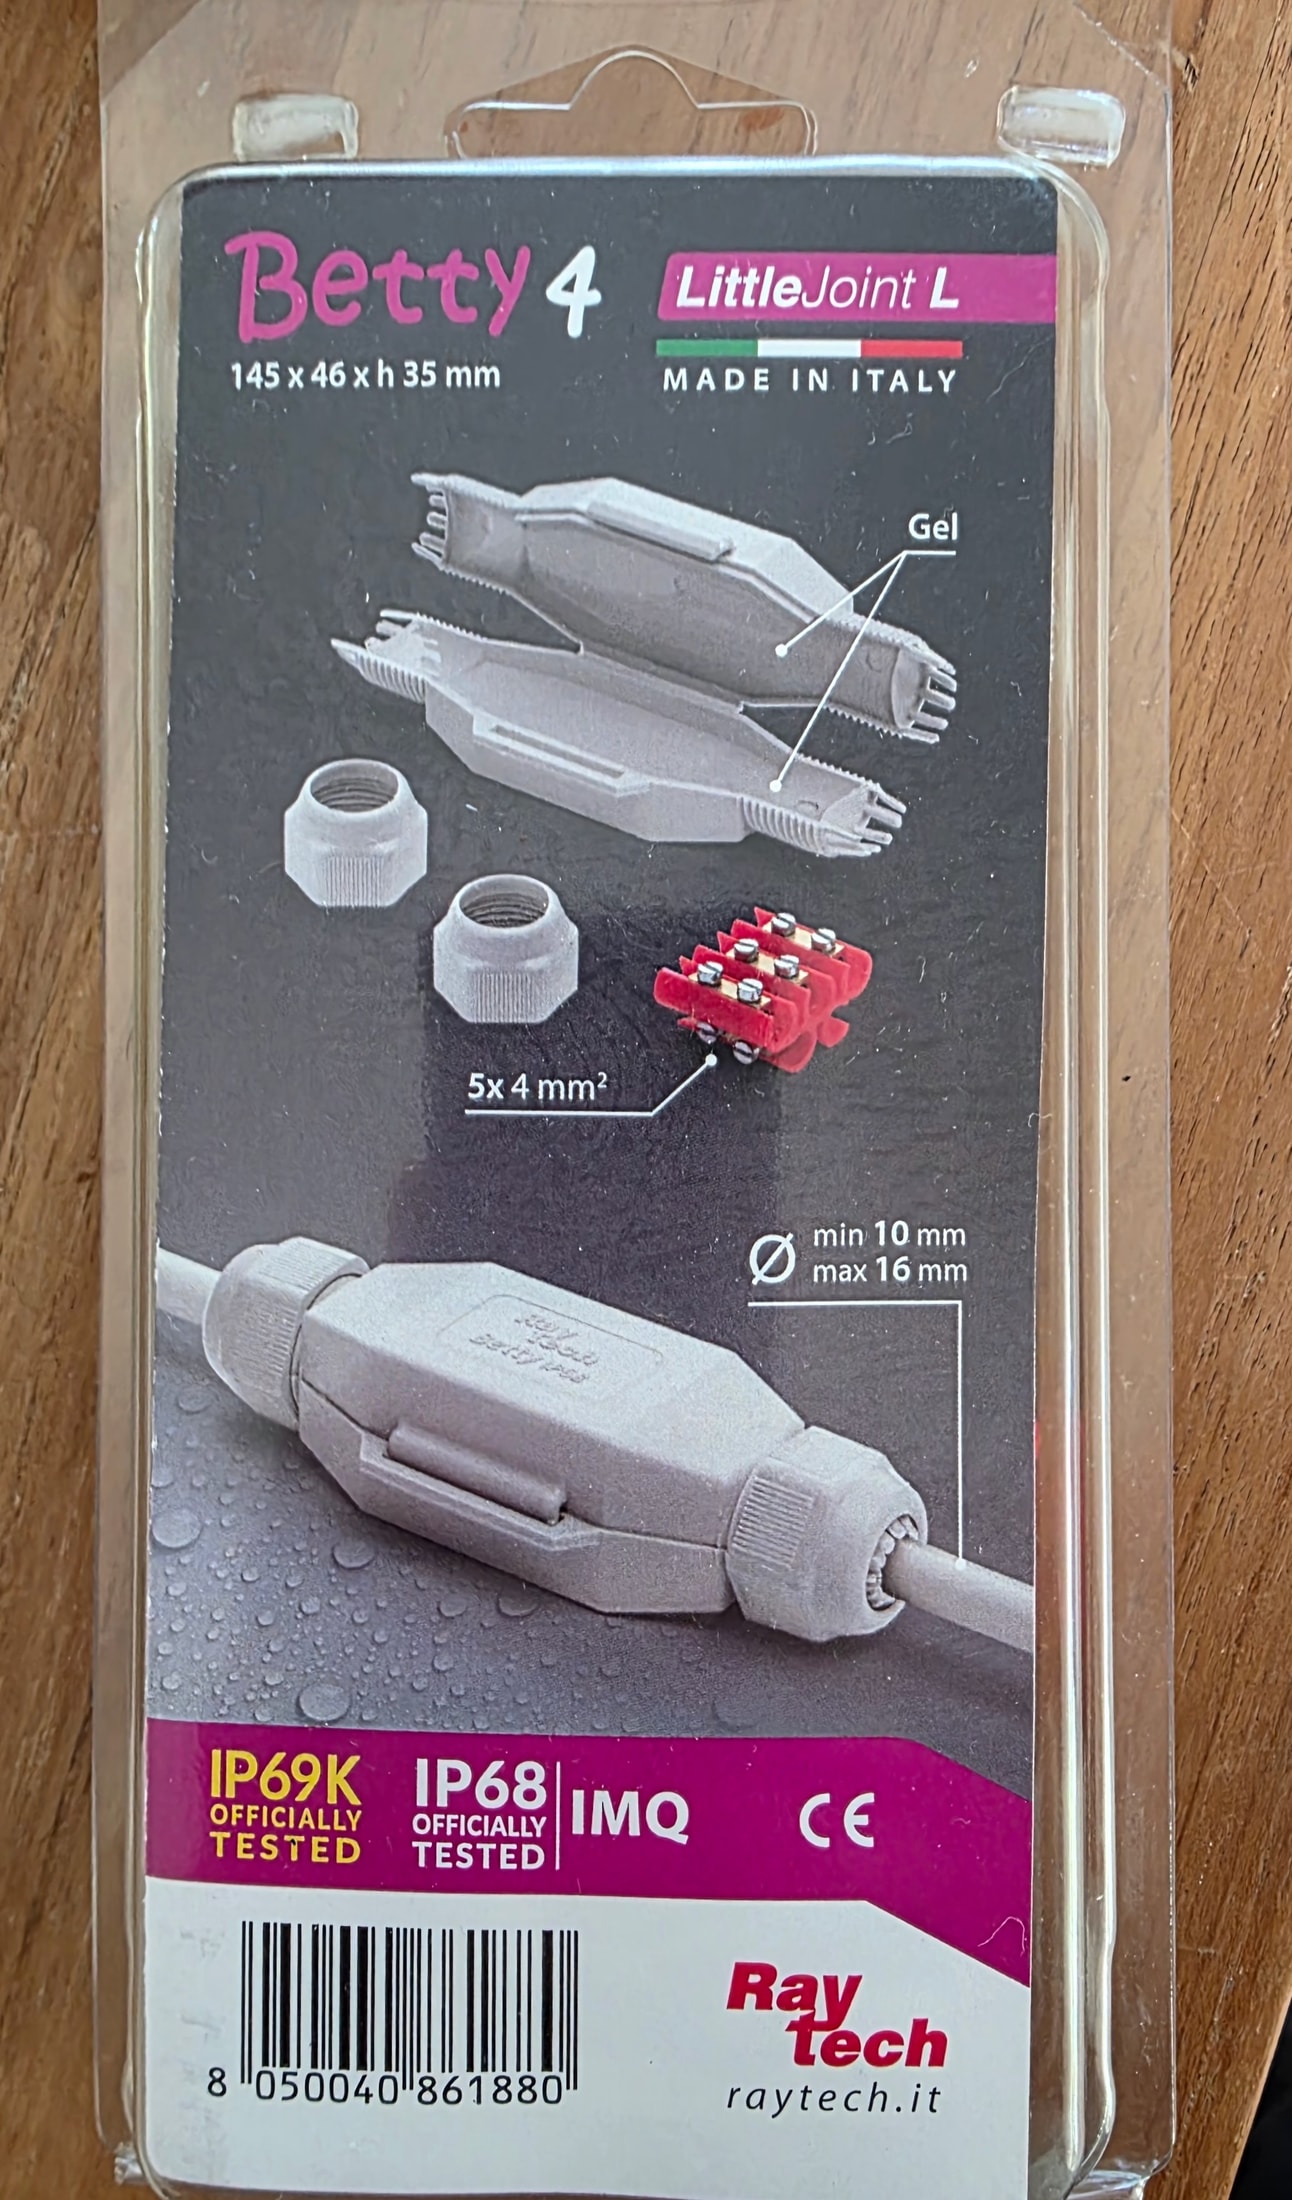
Packaging markings
The packaging is the first piece of evidence: the ratings and the test marking are printed on it before any disassembly.
Published 13 August 2026
In brief
Raytech’s Betty 4, from the Little Joint L range, is an IP68 waterproof connector ready to install: I installed it on a garden junction, and the gel-prefilled housing closed back over the connection in two minutes.
It’s a product officially tested by IMQ for IP68 and IP69K, unlike pouring gel into a box, which no organization certifies. My verdict: 3,75/5, recommended for a buried or submerged junction, with two real limitations to check before buying.
Raytech sent me the Betty 4 with its sealing gels.
IP68
officially tested by IMQ
145 × 46 × 35
mm — dimensions of the Betty/4
5 × 4 mm²
max capacity
10-16 mm
accepted cable diameter
The Betty 4 belongs to Raytech’s Little Joint L range: gel-prefilled micro junctions, supplied with their connector. The 145 × 46 × 35 mm housing accepts up to 5 × 4 mm² and cables from 10 to 16 mm in diameter.
The packaging states IP68 and IP69K officially tested by IMQ, CEI EN 50393 compliance where applicable, non-toxic gel (not classified under the CLP regulation) and UL 94-HB fire resistance. The operating temperature reaches 90 °C, and installation is done from −40 °C to +50 °C.
The installation principle comes down to one sentence: the cables enter through the integrated cable glands, the conductors connect to the supplied terminal block, and closing drowns the connection in the gel. Nothing to measure out, nothing to pour, no mixing to prepare.
The Little Joint L range covers cross-sections from 2,5 to 16 mm², from a small lighting point to the power supply for a garden shed. Raytech only publishes the dimensions for some of the models; the others are chosen on the basis of cross-section and cable diameter.
| Model | Max capacity | Cables | Dimensions (mm) |
|---|---|---|---|
| Model Barney | Max capacity 2 × 2,5 mm² | Cables 6-10 mm | Dimensions (mm) 80 × 36 × 23 |
| Model Fred | Max capacity 3 × 2,5 mm² | Cables 8-13 mm | Dimensions (mm) — |
| Model Fred/4 | Max capacity 3 × 4 mm² | Cables 8-13 mm | Dimensions (mm) — |
| Model Dino | Max capacity 4 × 4 mm² | Cables 10-16 mm | Dimensions (mm) 125 × 43 × 35 |
| Model Betty/4 | Max capacity 5 × 4 mm² | Cables 10-16 mm | Dimensions (mm) 145 × 46 × 35 |
| Model Betty/6 | Max capacity 5 × 6 mm² | Cables 14-19 mm | Dimensions (mm) — |
| Model Tom | Max capacity 5 × 16 mm² | Cables 19-23 mm | Dimensions (mm) 180 × 53 × 42 |
Little Joint L range according to the product sheet and the Raytech data sheet.
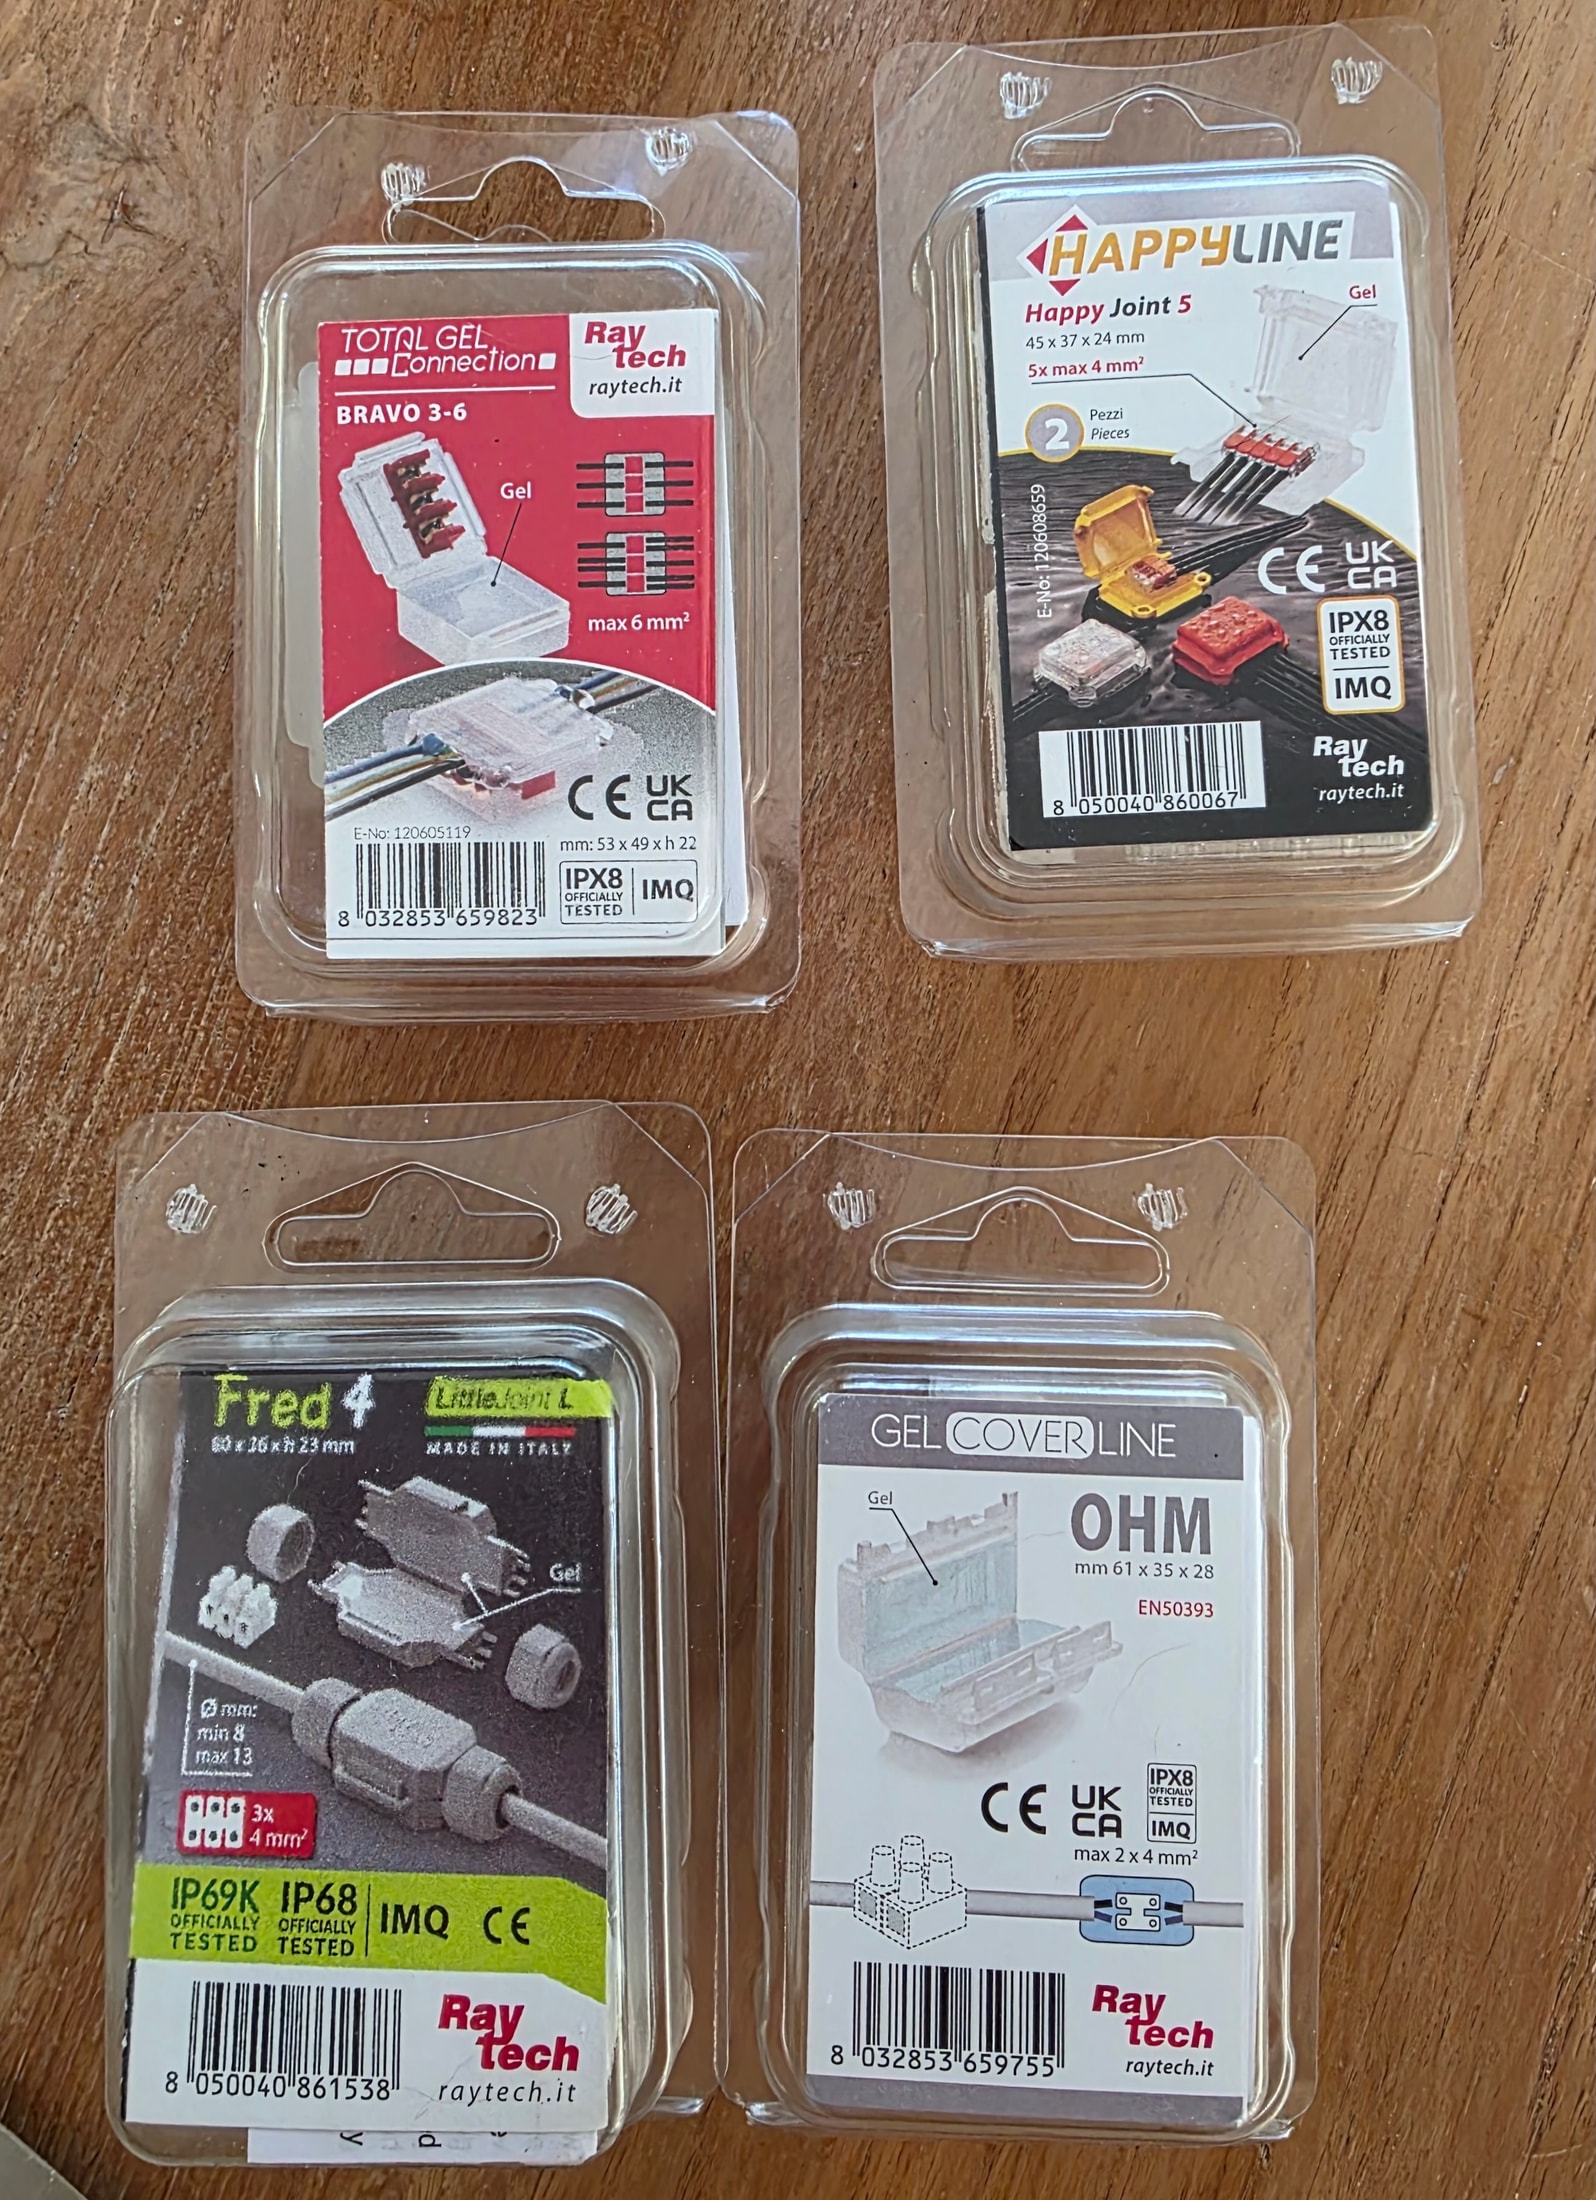
The model in the test is the Betty/4, with its grey Fred IP68 connector: a white screw terminal block, which can also be used as a domino. The same connector is found on the other enclosures in the range, which limits surprises during installation.
For the choice between gels and enclosures, my test of the Raytech sealing gels details the two-part Magic Gel and the Wonder Gel, with the limits of each approach.
The word that changes everything on this product is tested. Pouring gel into a waterproof junction box is a pragmatic but uncertified site practice: no test validates the assembly of box plus terminal plus gel.
The Betty 4, on the other hand, is a product tested by a third-party body, with waterproofness ratings that are stated and verified.
The IMQ (Istituto Italiano del Marchio di Qualità) is an accredited Italian certification body, also present in France. The mention « IMQ Officially Tested » means that the sealing tests were carried out by the body, not merely described by the manufacturer: that is what home pouring cannot produce.
The IP68 rating combines protection against dust (6) and continuous immersion (8). IP69K adds resistance to high-pressure and high-temperature jets, a rating inherited from the food industry: useful for a powerful water jet or cleaning a patio.
IEC EN 50393 compliance covers connection devices for cables; the UL 94-HB rating concerns the fire behaviour of the gel alone. Both values are documented in the range’s data sheet, as is the −40 °C to +50 °C range for installation and the 90 °C service temperature.
Look first at the markings printed on the packaging, then at how the cables pass through the housing: a tested product can be recognised by the stated ratings and the integrated cable glands.
Packaging markings
The packaging is the first piece of evidence: the ratings and the test marking are printed on it before any disassembly.
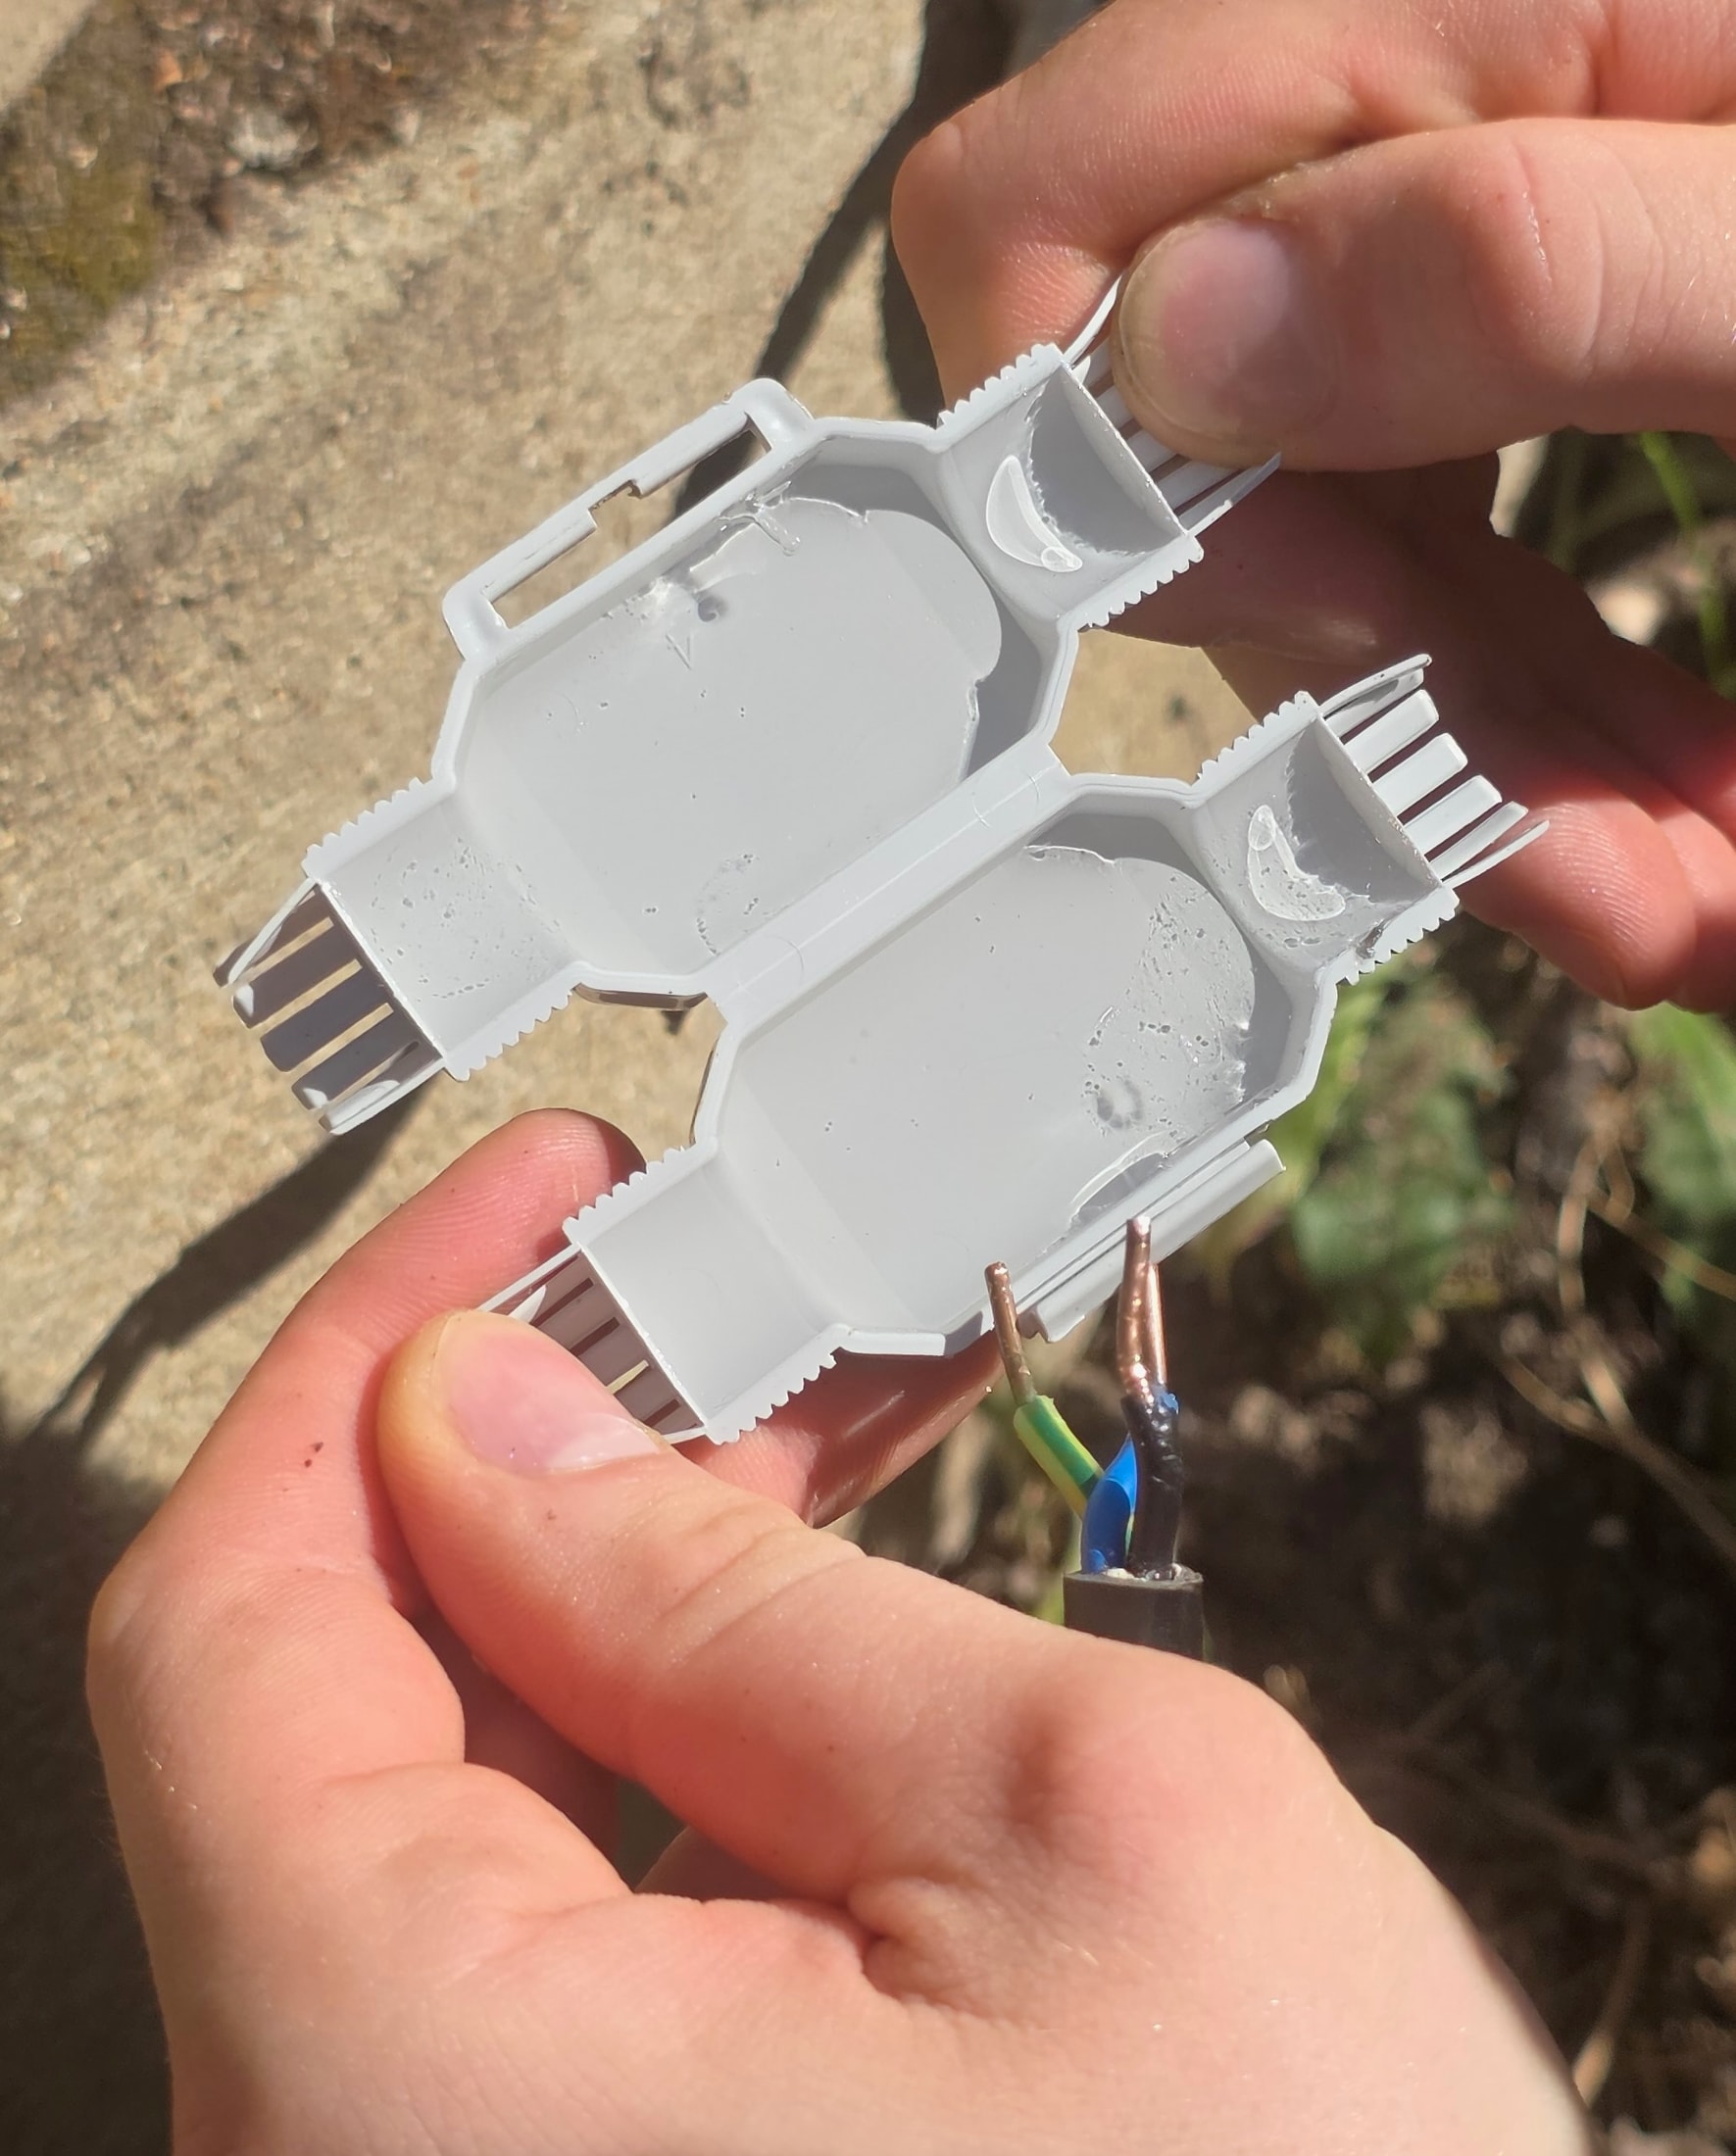
The usable volume
Opened, the Betty 4 shows its cavity: the pre-filled gel engulfs the terminal block when it closes.
The gel in the housing is non-toxic and not classified as hazardous under CLP: no special safety labeling on site, unlike some casting resins. Raytech also states that the connector remains always re-enterable (« always re-enterable »): it can be reopened and closed again without replacing the hardware.
I fitted the Betty 4 on a garden lighting junction, with R2V cable on the supply side and the circuit identified at the panel. Switching off the power and checking with the voltage tester came before every operation: a garden box is treated like a normal circuit, never live.
Before opening the connector
An outdoor junction should only be worked on with the circuit identified and de-energized. Switch off the relevant circuit at the panel, prevent any re-energization, then verify the absence of voltage with the voltage tester before touching the conductors.
Shut off and verify
Switch off the circuit at the panel, lock out the re-energization, check the absence of voltage with the voltage tester.
Strip the conductors
Strip each conductor with the appropriate stripping tool, without nicking the core or leaving loose strands around the terminal.
Tighten in the screw terminal block
Insert one conductor per terminal of the white terminal block and tighten the screw with a screwdriver, or connect to the connector block before closing.
Reclose over the gel
Close the housing pre-filled with gel, checking that the cable glands grip the cables around their full circumference.
Check
Check the complete closure, the tightening of the cable glands and the tripping of the 30 mA RCD before switching the power back on.
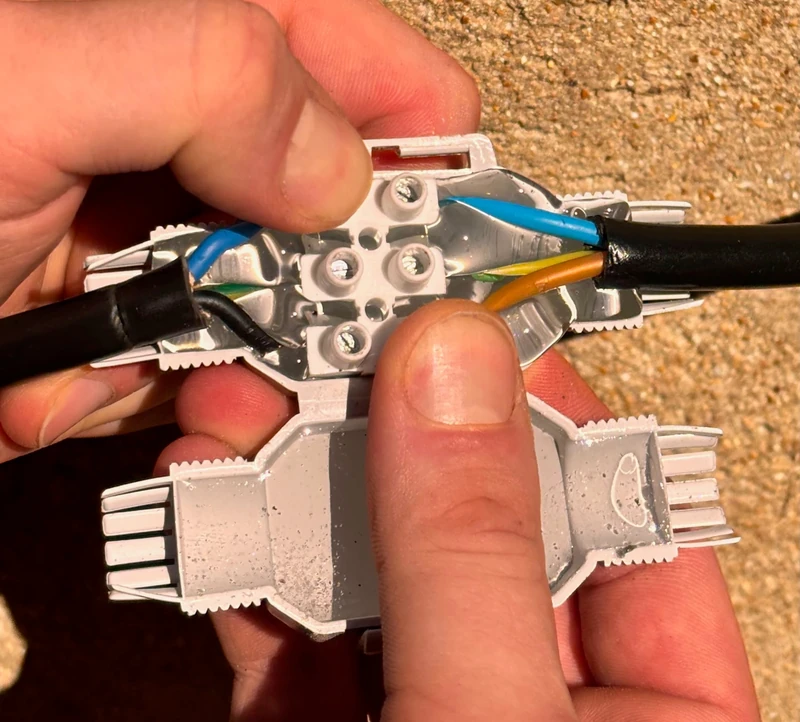
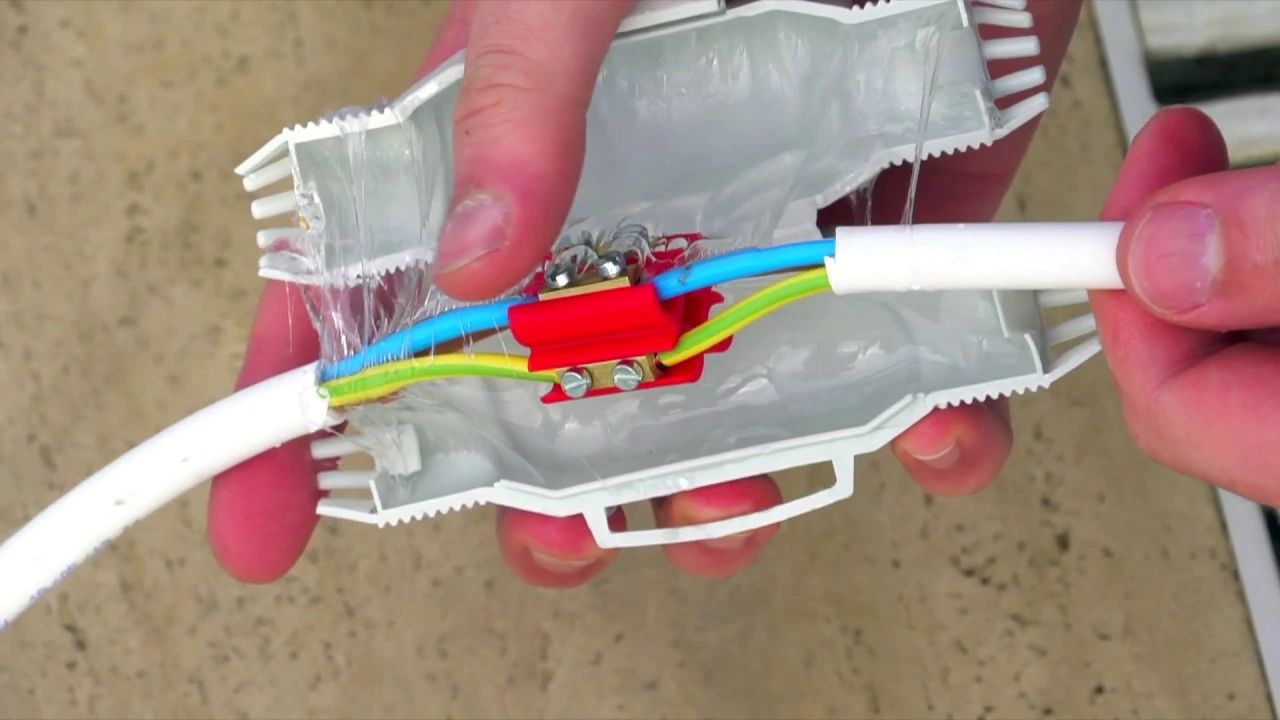
The assembly happens in the hand: the cables enter through the cable glands, the conductors connect to the white screw terminal block, and the pre-filled gel coats the connection when it closes. I checked the connection of two black cables to the terminal block, then the inside with the colored wires and the gel.
The inside confirms the principle: the colored wires are inserted into the terminals, the gel fills the rest of the volume, and closing floods the connection. No preparation, no mixing: the product comes out of the packaging ready to receive the conductors.
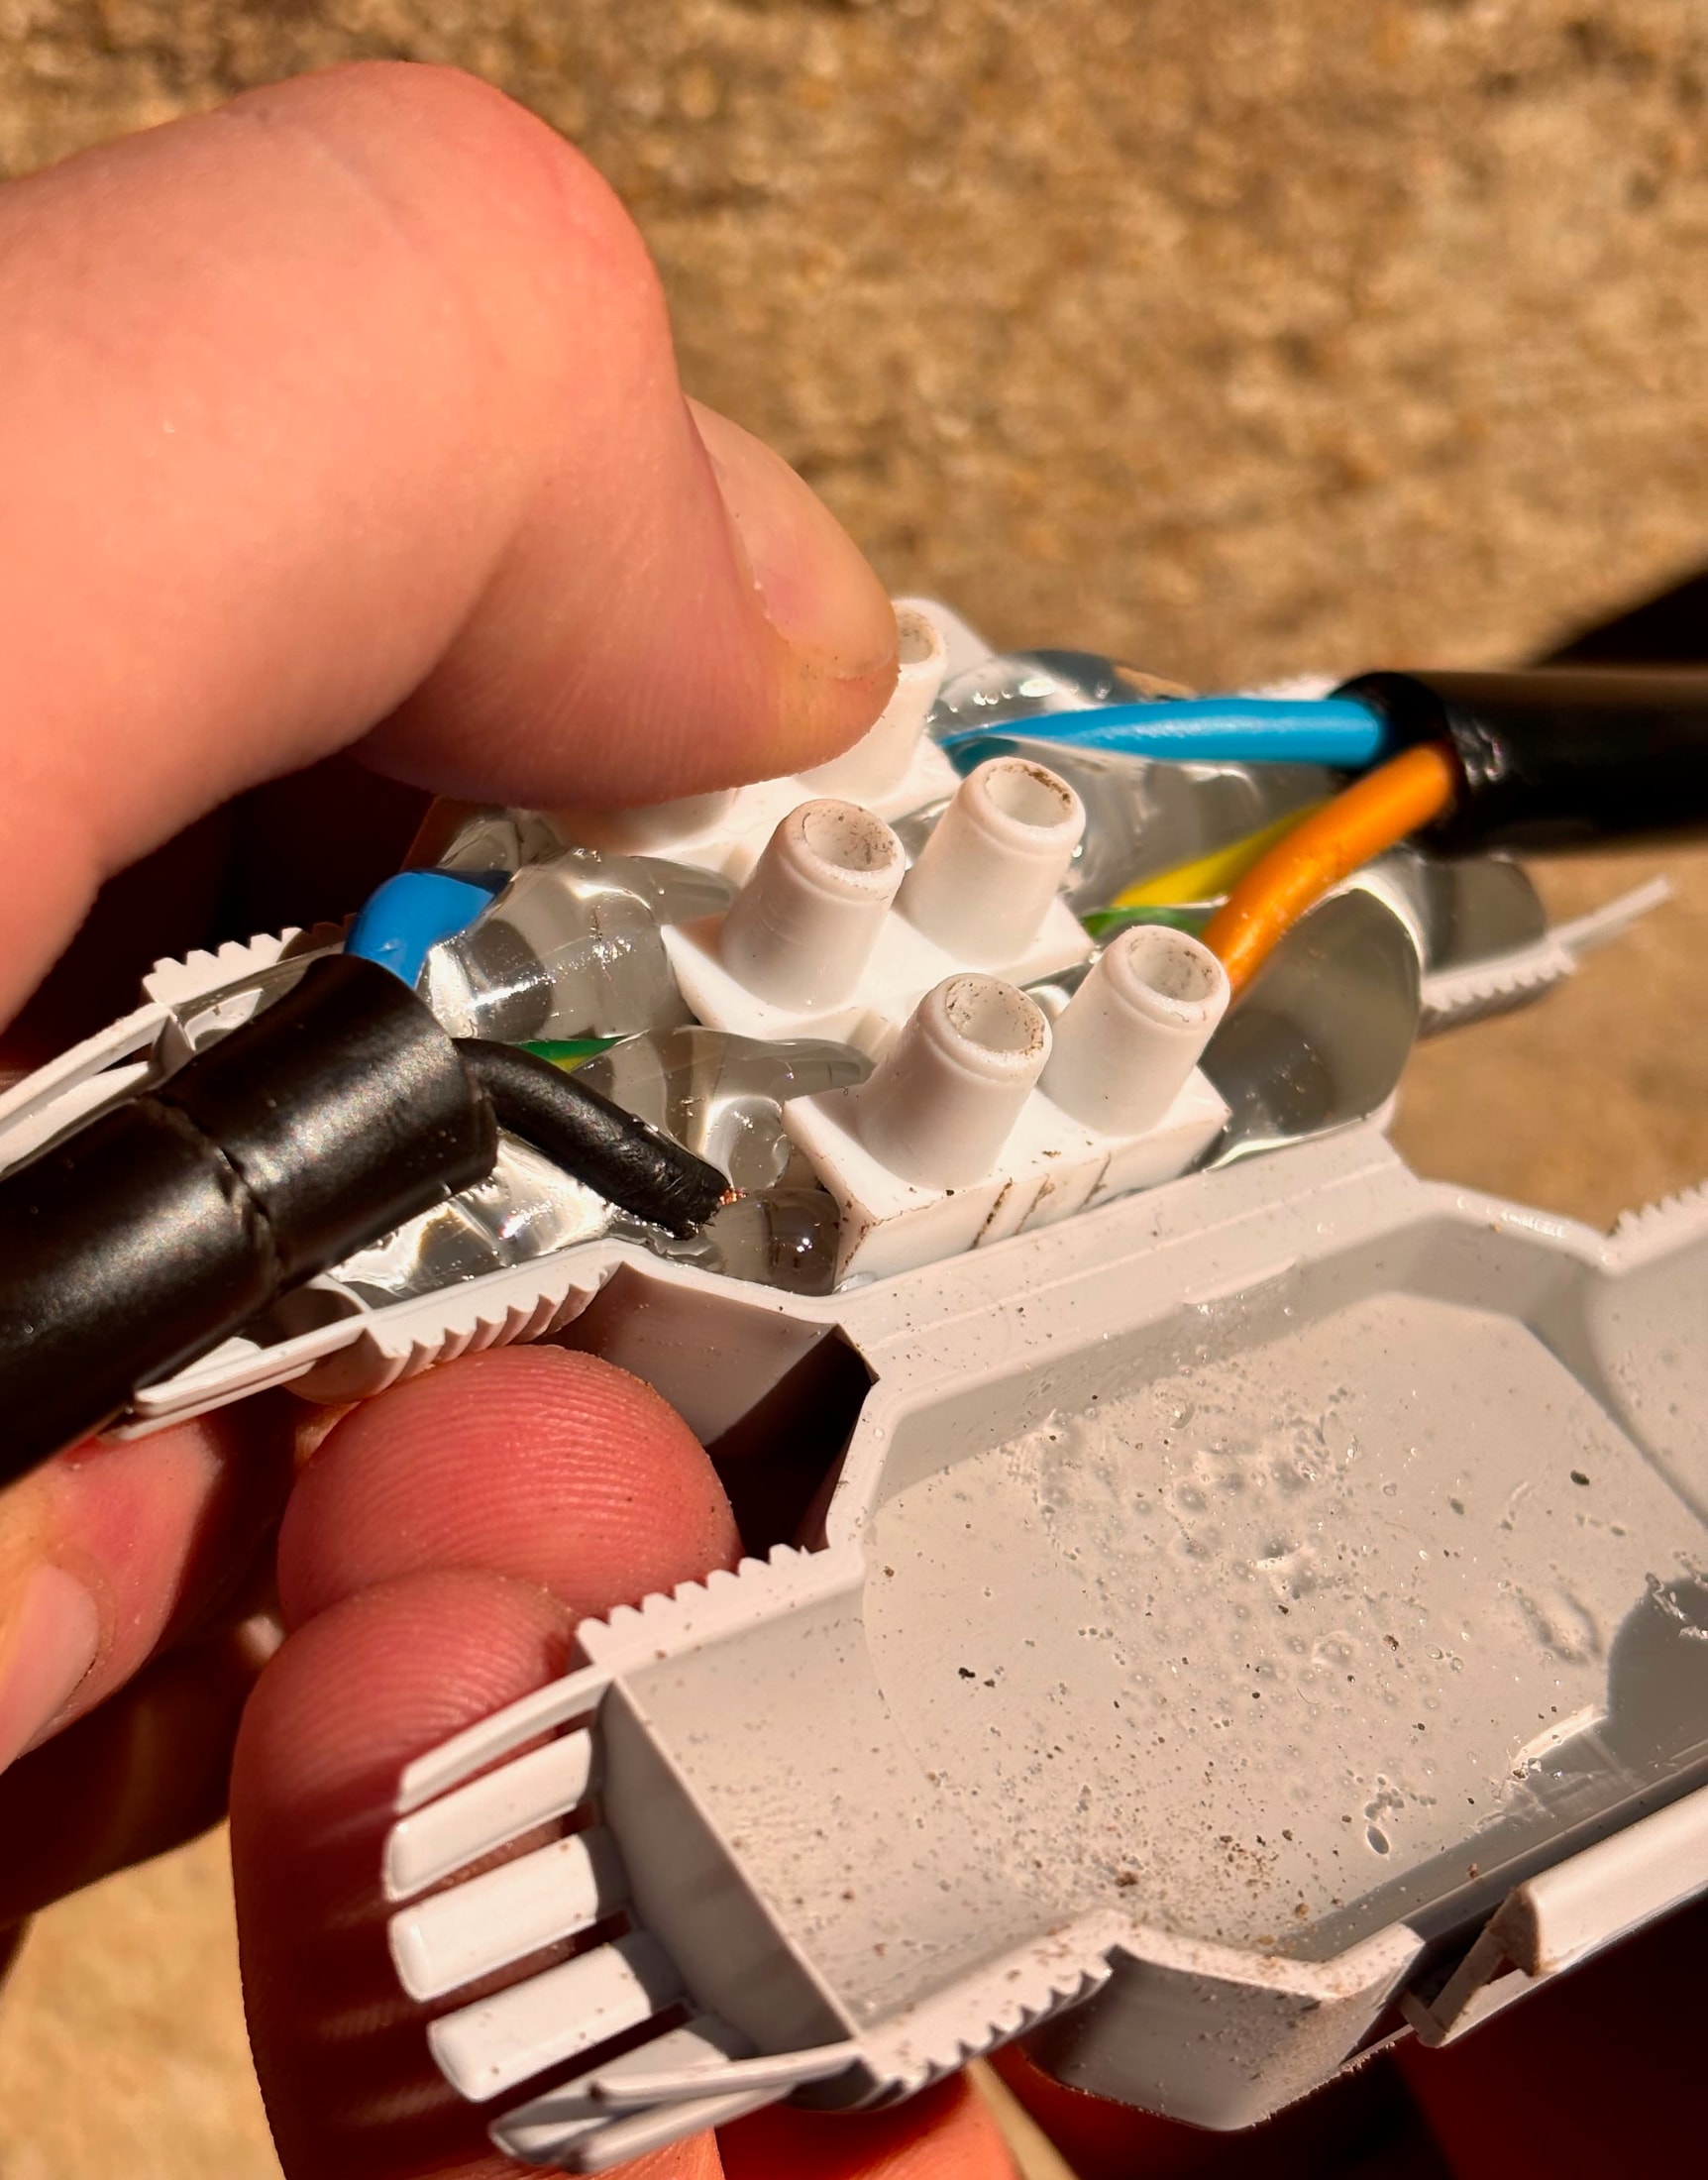
Inside the Betty 4
When you open it, the terminal block and the gel are easy to spot before closing it again: this cavity is what makes the connection waterproof.
The gray connector supplied with the box is the Fred IP68: a white screw terminal block that can be taken apart, worked on with a connector block, and closed again with the gel that overflows slightly onto the seals — the expected behavior of a waterproof seal.
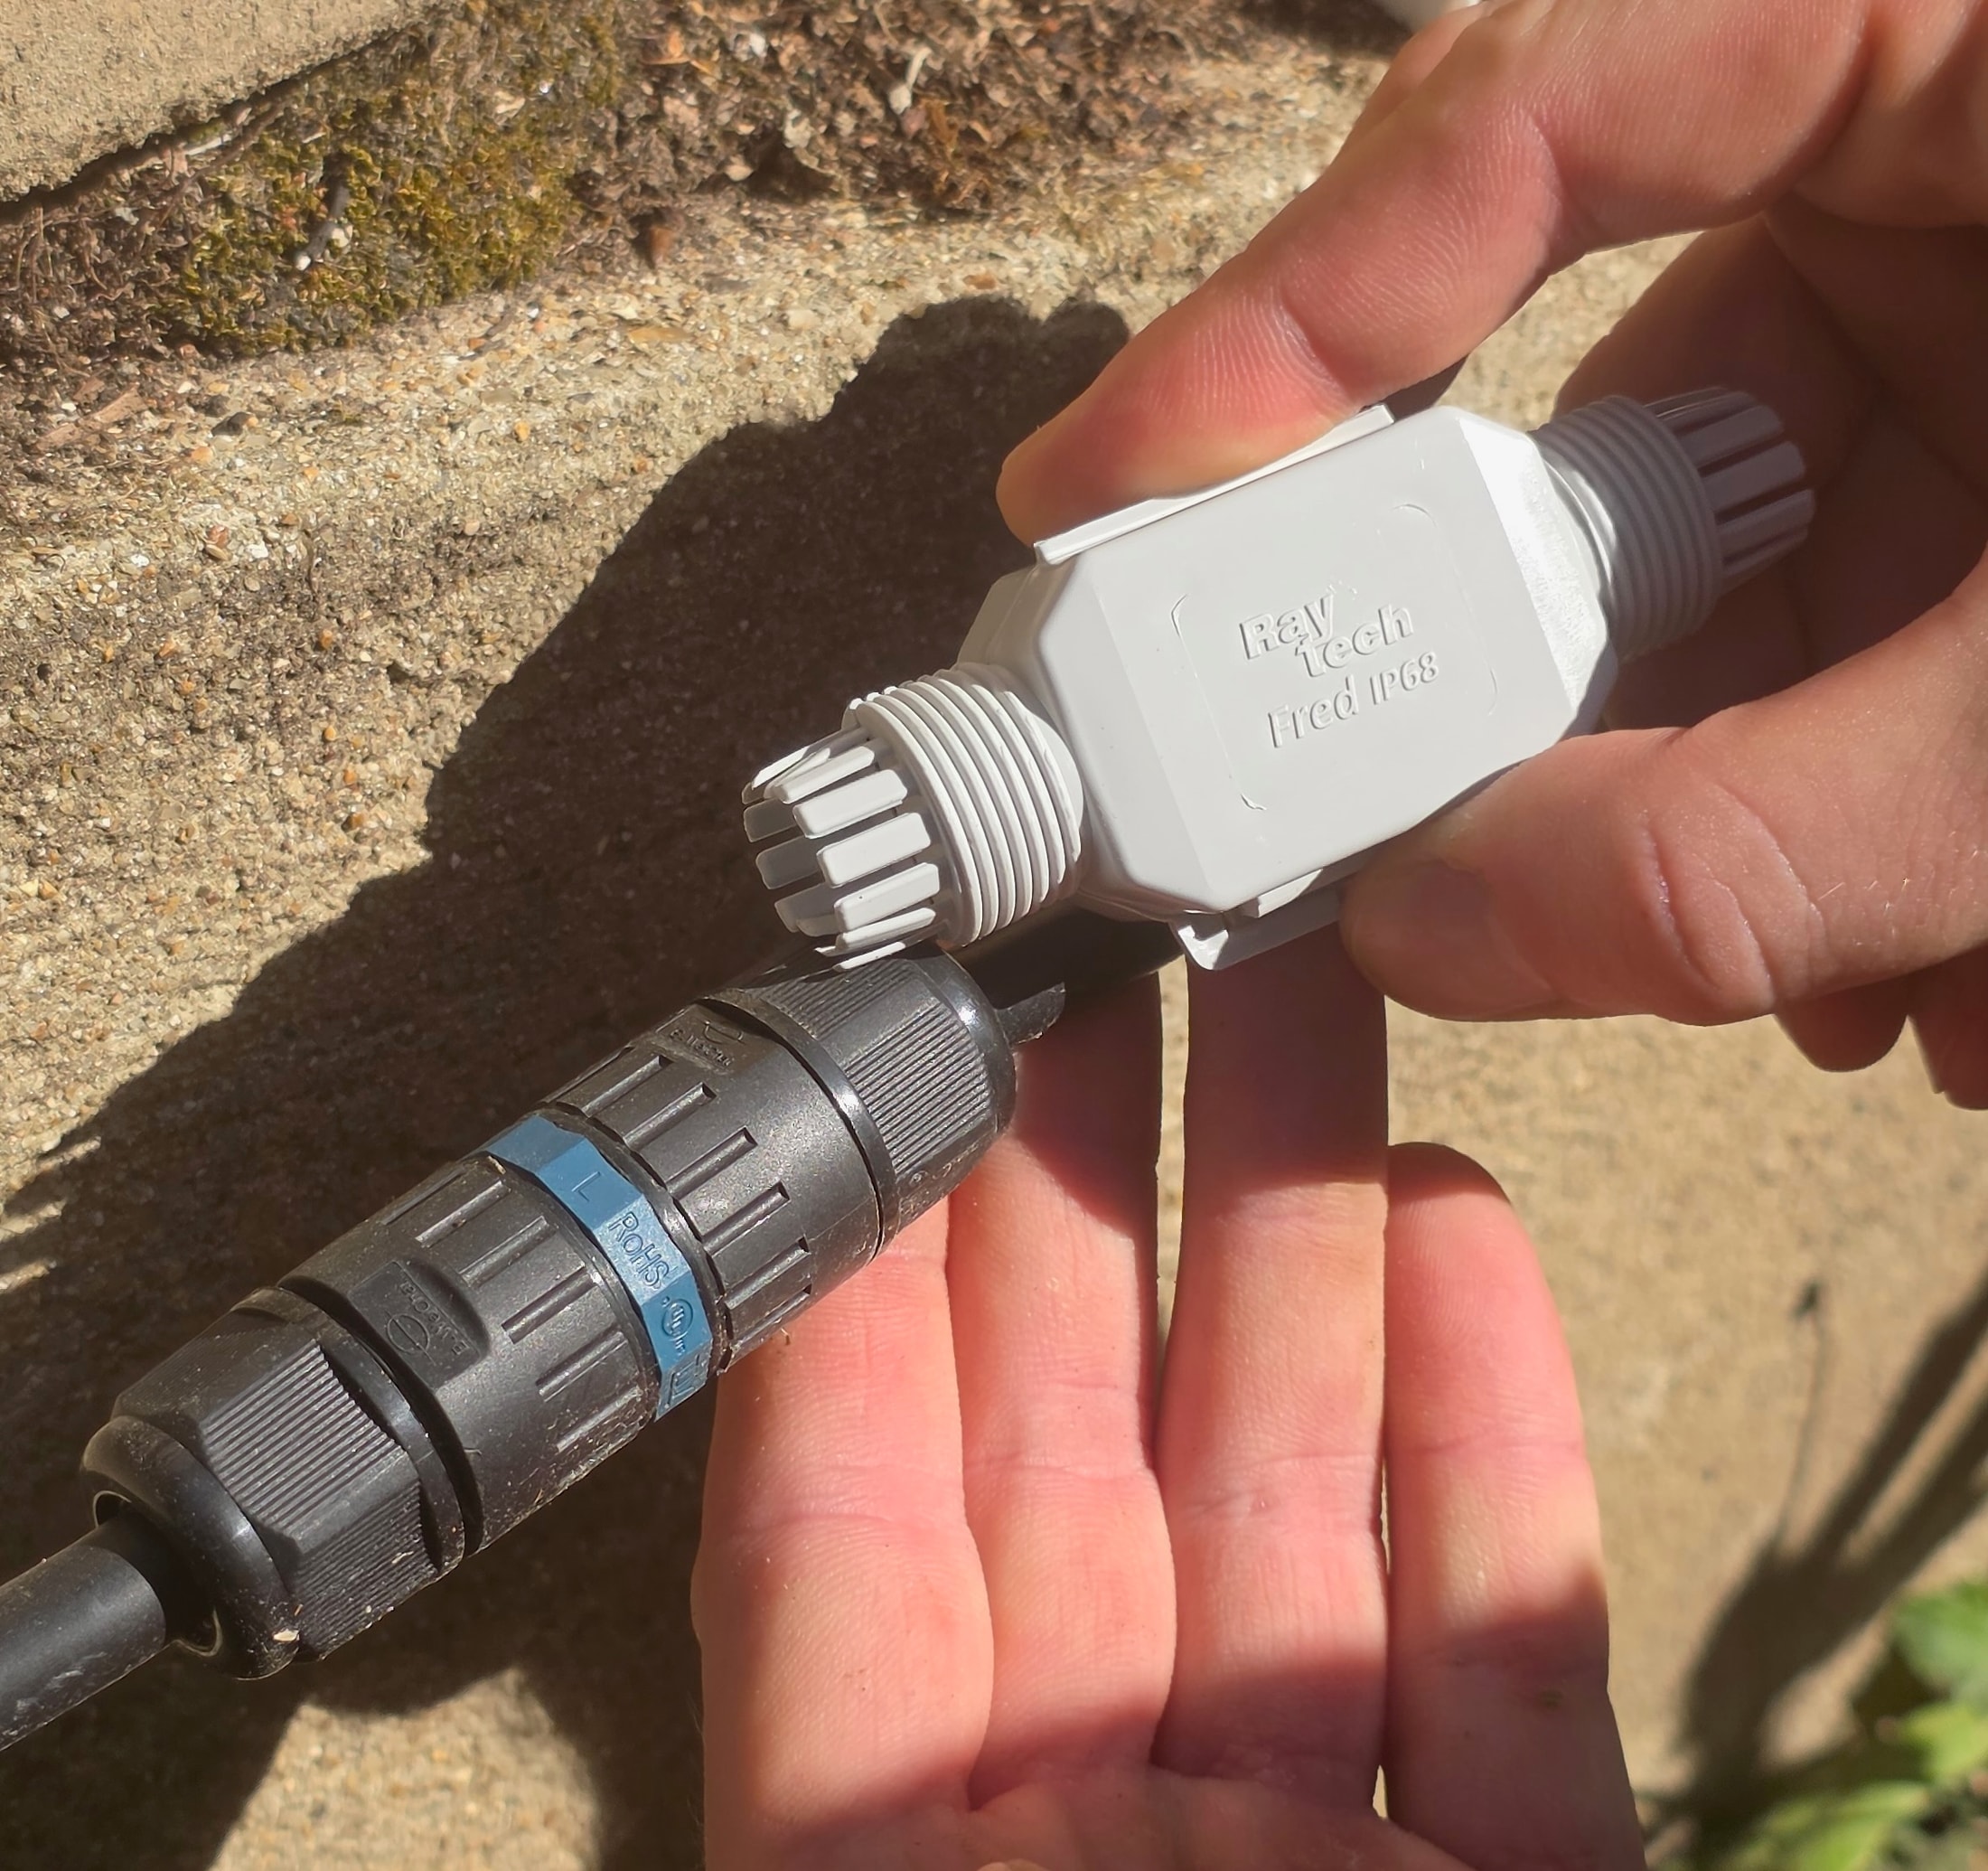
Fred IP68 facing a black connector
The gray connector supplied with the Betty 4 box is the Fred IP68: its housing can be recognized before installation, facing a black connector to compare formats.
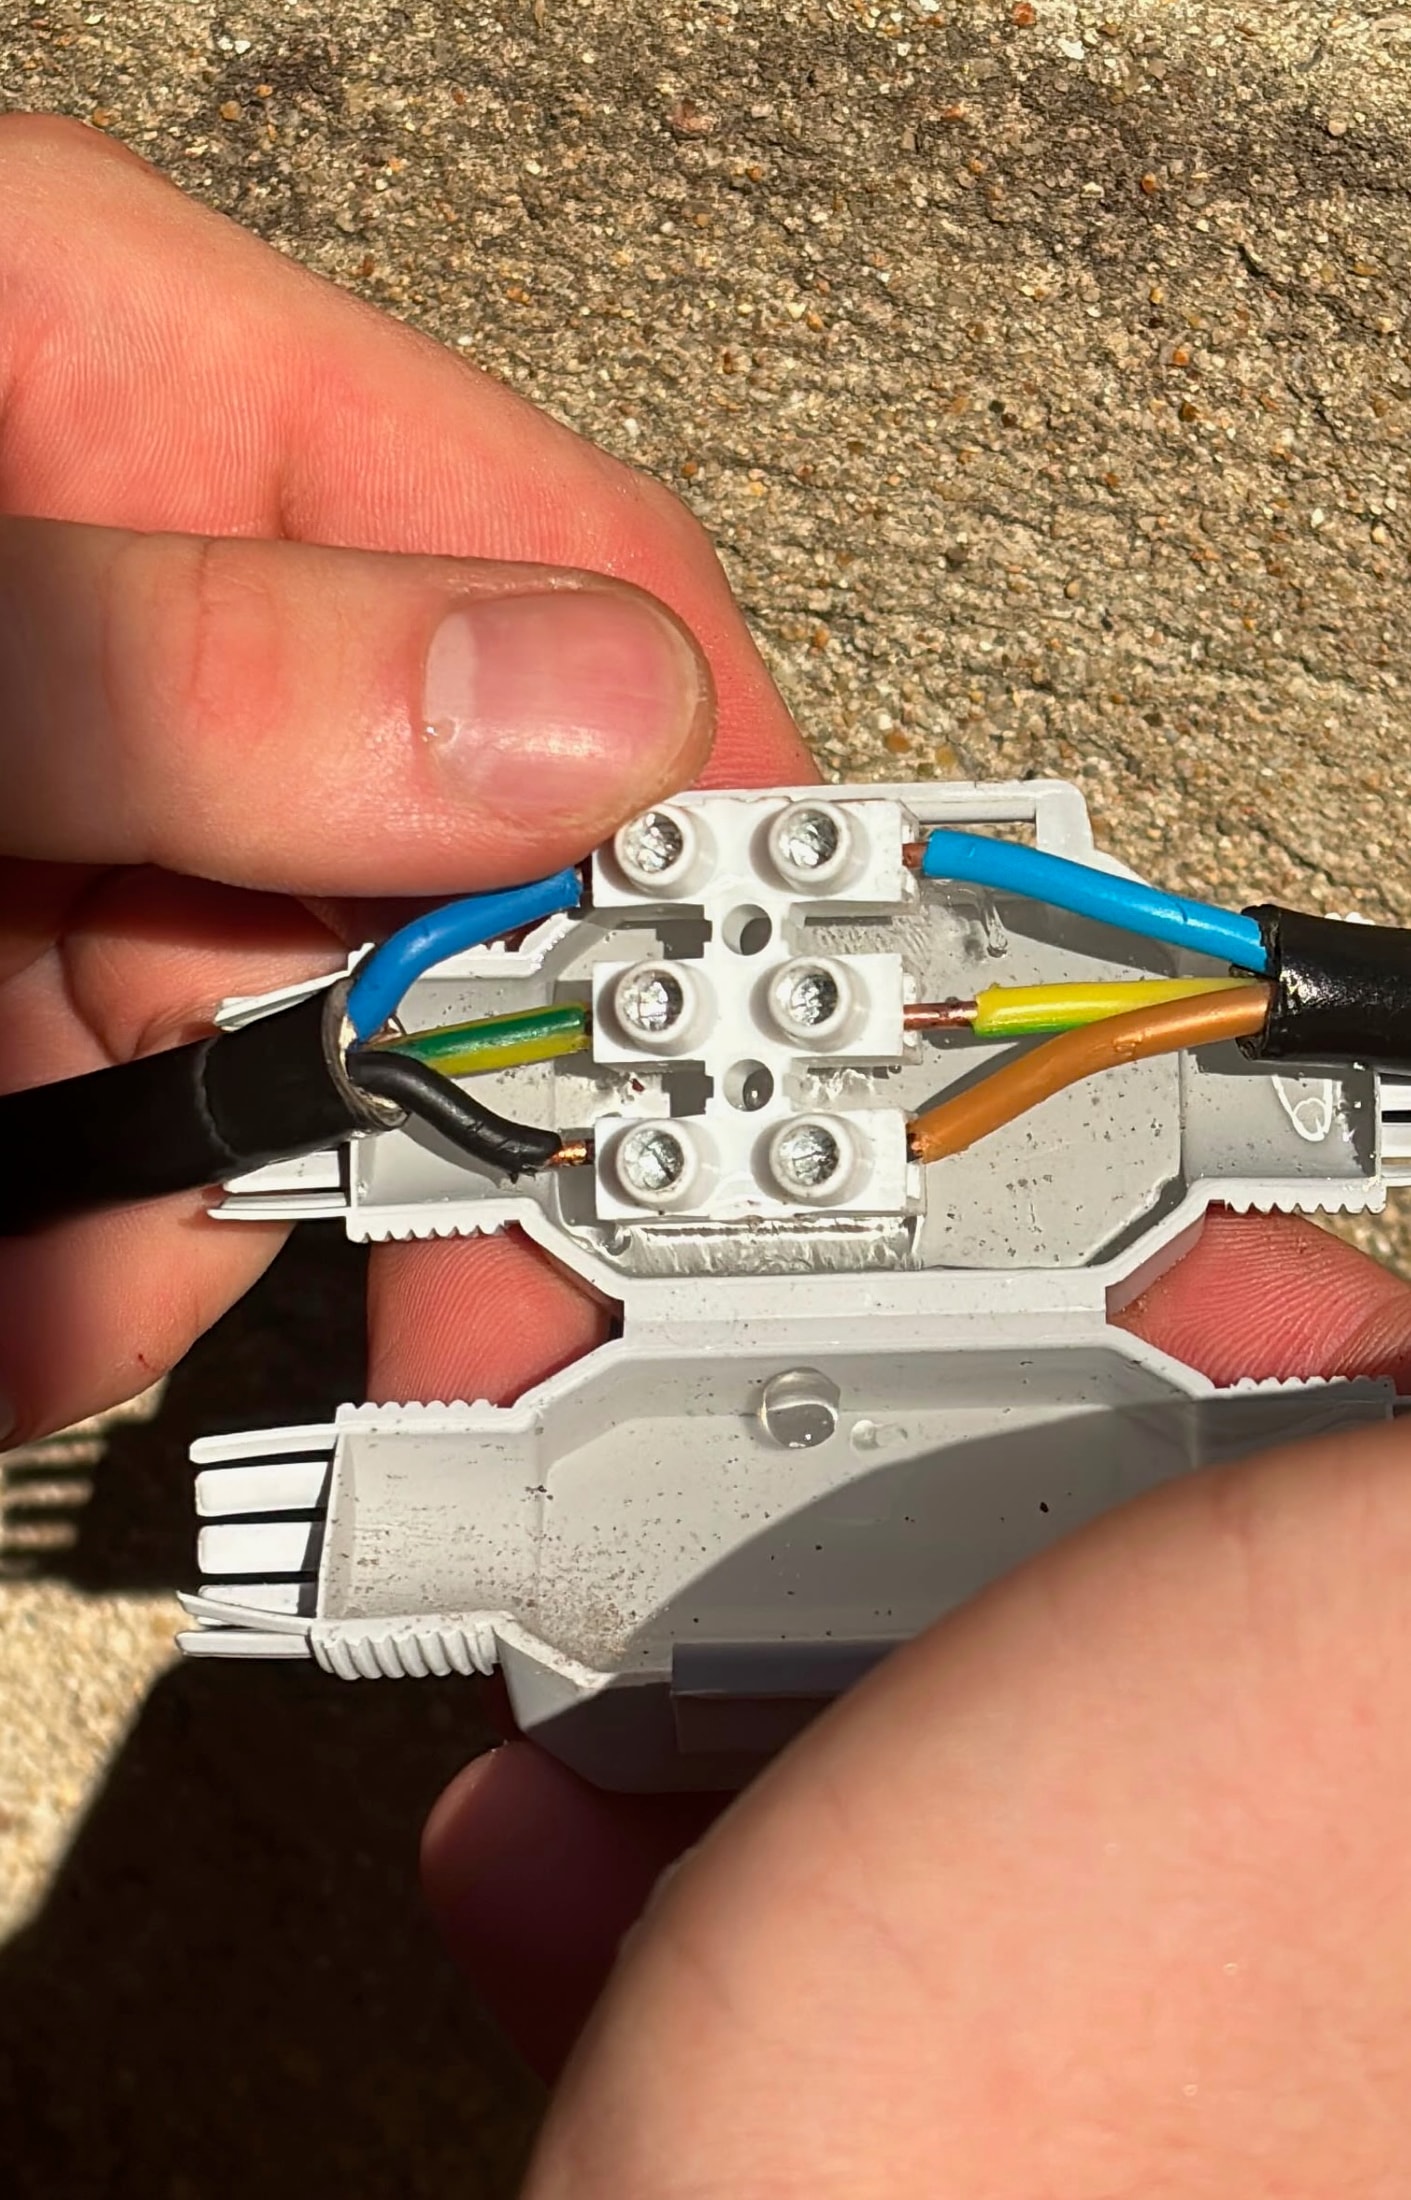
The terminal block is tightened with a screwdriver, with the stripped R2V cable in the background: each screw holds a conductor before the gel floods the whole assembly.
The terminal block seated in the gel shows the alternative version: the connection is flooded inside the Fred, and the wires remain accessible if any work is needed.
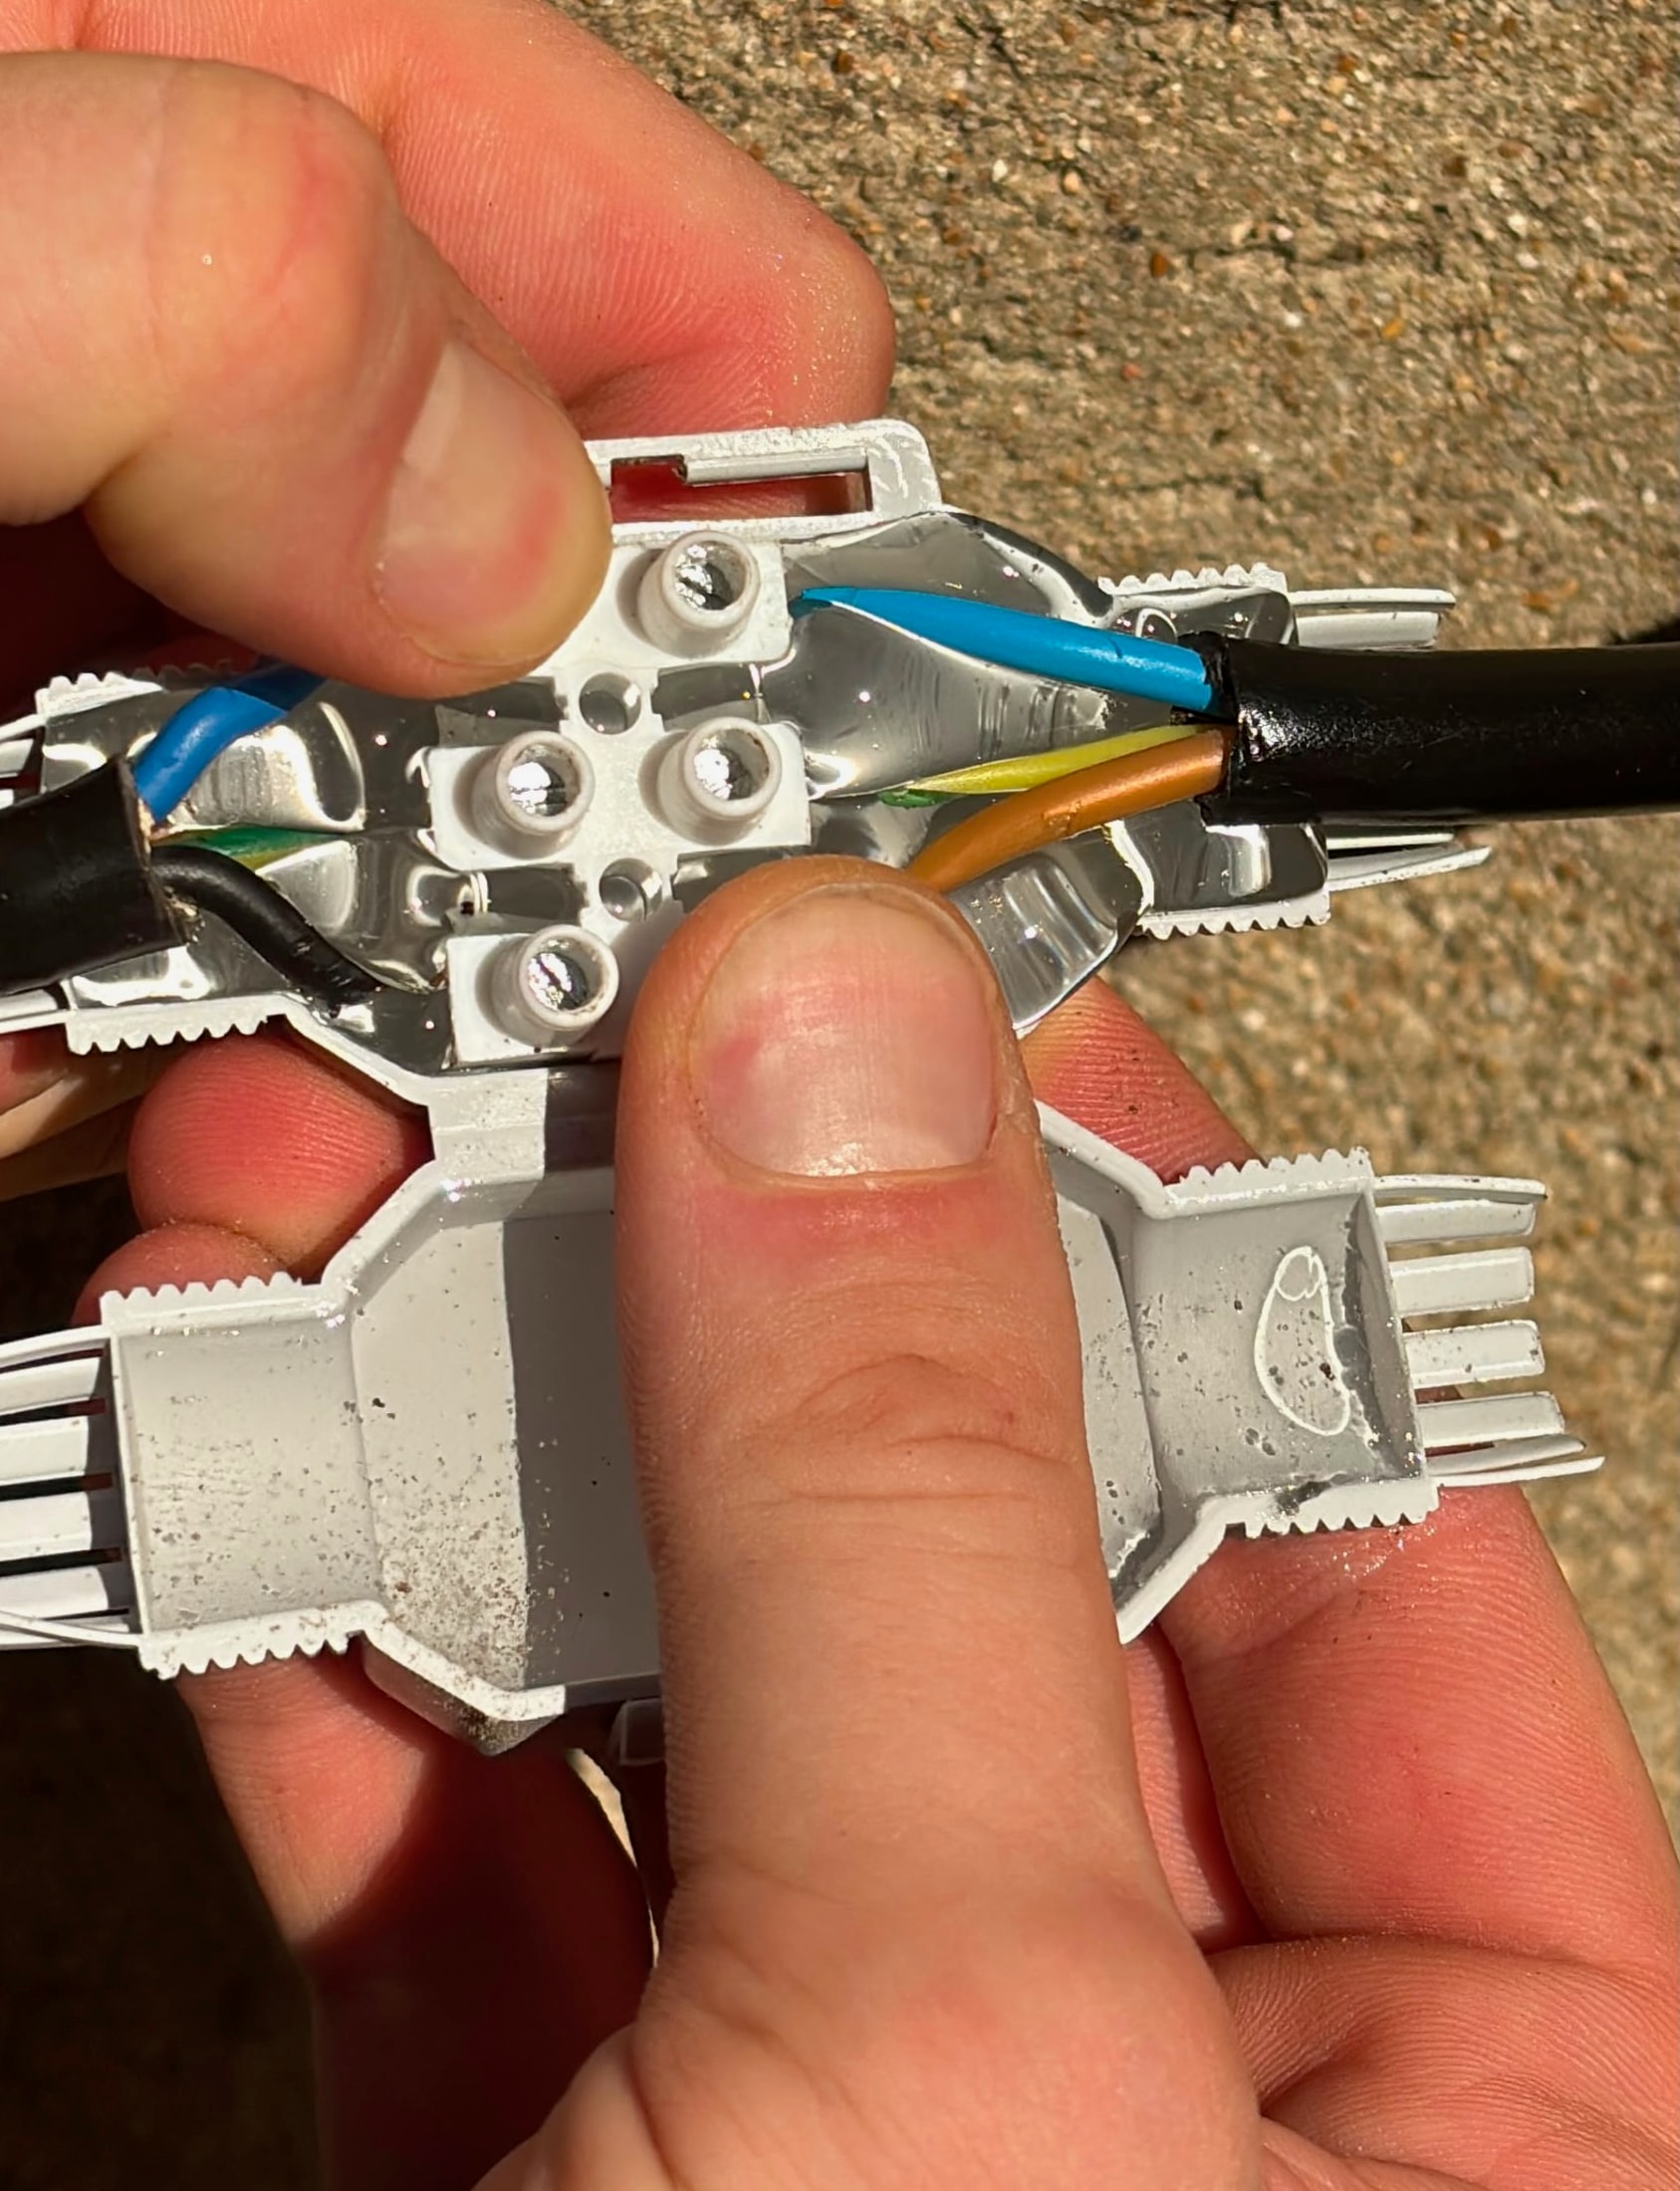
With the Fred closed, the gel overflows onto the seals — a sign that the connection is properly flooded — and the R2V 2,5 mm² cable stays attached to the connector.
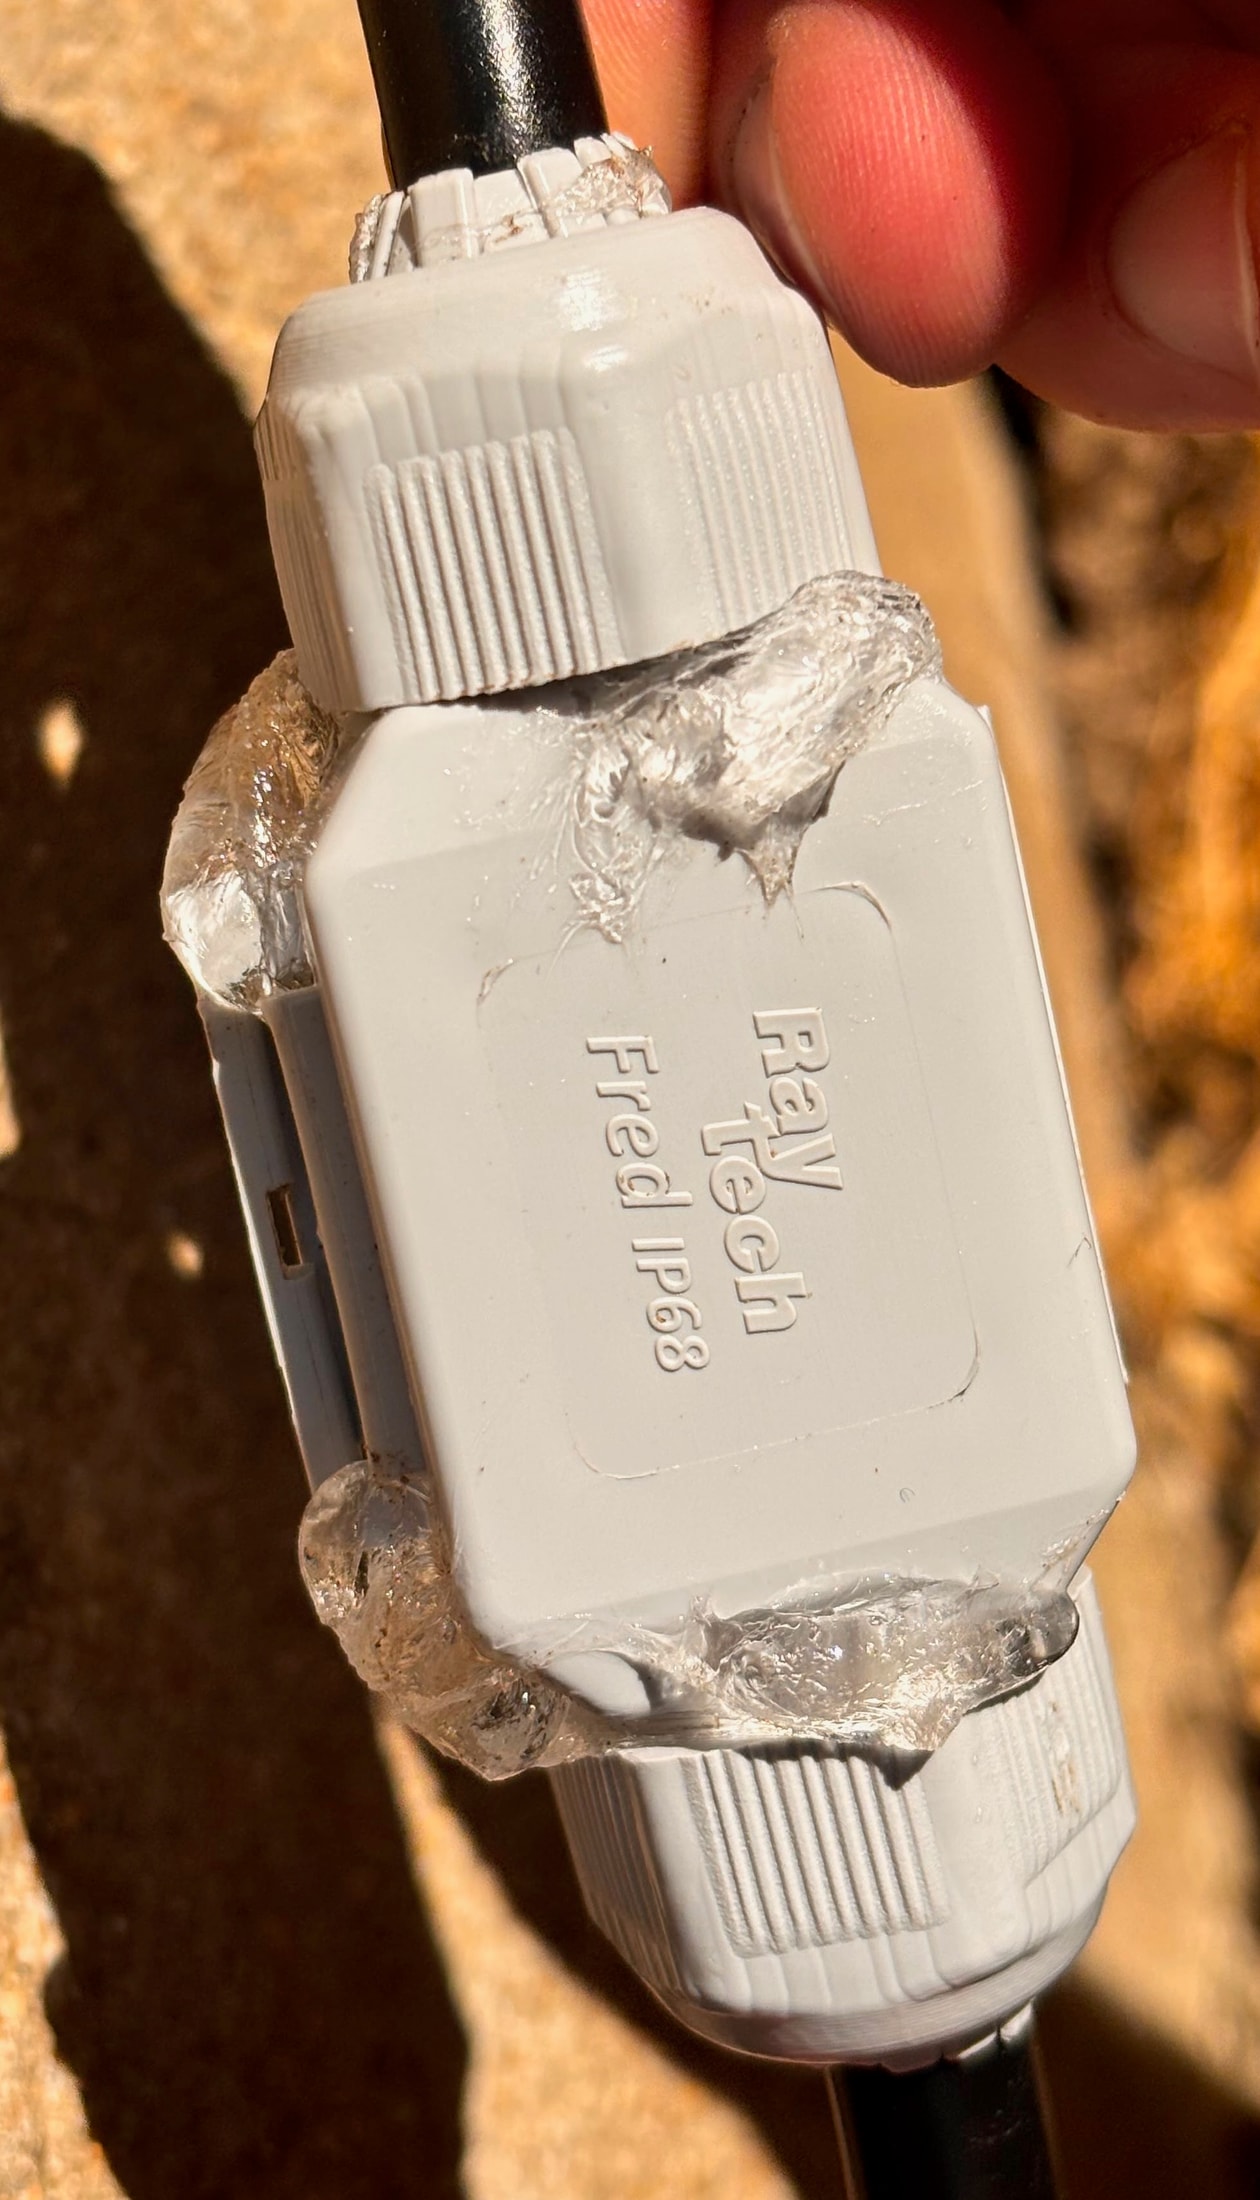
Held in the hand, the closed version with the terminal block connected inside shows the slight expected overflow: the gel spills over the edges and keeps the R2V cable held in the seal.
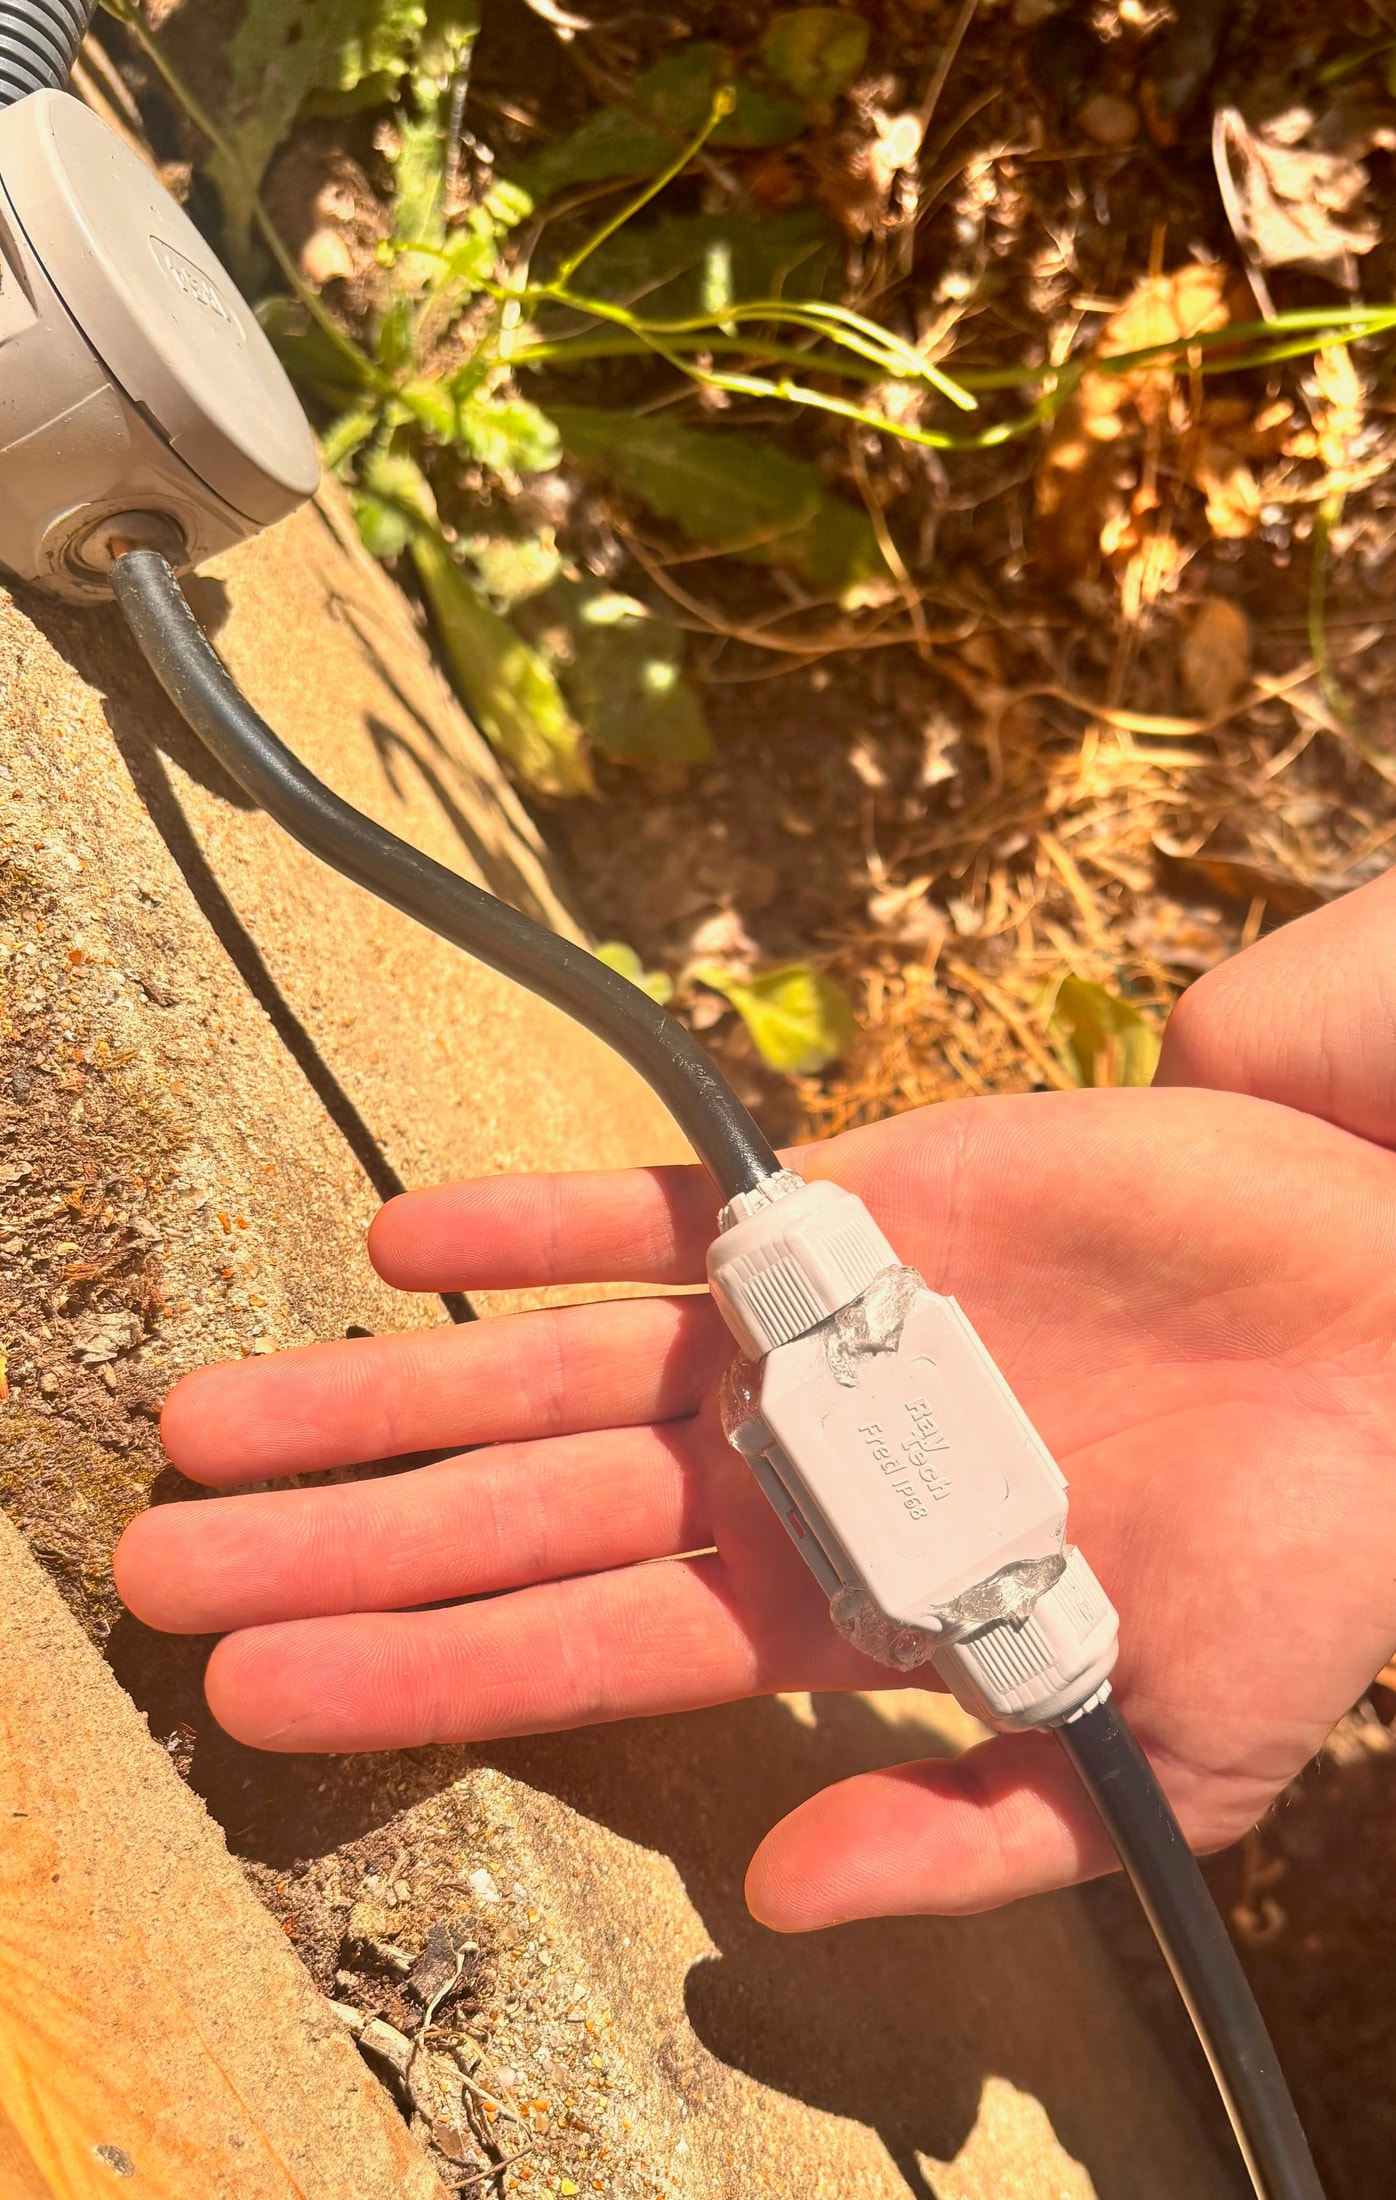
Open, filled with transparent Magic Gel and held in the hands, the Betty 4 shows its usable volume: the cavity fills up, the terminal block is submerged, and the connector closes over the gel.
Two practical observations stand out from this installation. First, the order of operations matters: prepare the cables and the conductors before opening the housing, so as not to leave the gel or the terminals exposed unnecessarily.
Then, the closure is checked by touch: the gel overflow on the seals is the sign that the cavity is full.
The advertised re-accessibility checks out in principle: you reopen it, remove the gel with one hand, work on the terminal. It is the decisive advantage over a housing flooded with resin, irreversible, and it is what convinced me for pending connections that evolve.
Before opening the housing, I prepare the lengths and line up the tools on a clean cloth: wire stripper, screwdriver, cable markers. The gel thus stays sheltered from the sand during preparation.
I start by identifying the conductors that look alike. On a lighting junction, two identical wires are easily confused: a marker placed before cutting avoids cross-connecting and having to redo the tightening.
Stripping comes next: I remove only the length needed for the terminal, without nicking the core. One nicked strand or loose strands hanging around the terminal, and the contact becomes unreliable.
The circuit is switched off before anything else: I lock out re-energisation and check for absence of voltage with the VAT before opening the box, never after. Opening without checking means a connection that can end up live in my hands.
Then comes tightening. Each conductor goes into its terminal, the screw is tightened with a screwdriver while holding the sheath, then I gently pull on each wire to check that it does not move. A conductor that moves is redone right away.
Before closing it up, I run a clean cloth over the rim of the box: a grain of sand on the seal and the closure no longer seats properly. The closure is then checked by touch, as in my test: the gel must overflow slightly.
Finally, I count the connected conductors before closing up. A forgotten terminal is caught at that moment, not at the first fault.
If the certification, the gel and the fitting deserve praise, one point bothers me about this product: the connection relies on screw terminal blocks.
Terminal blocks loosen over time: the screw works, the contact slackens, and the tightening/resistance relationship changes. Eventually, this tends to create contact resistance and overheating — the classic scenario of a connection heating up under load.
It’s fairly archaic as a connector: the screw thread doesn’t replace the constant pressure of a spring.
That regret doesn’t disqualify the Betty 4, but it explains why my final score is 3,75/5 rather than 4.
To protect an outdoor joint, two routes are available on the market. The Betty 4 brings its terminal block and its gel in a pre-filled and tested enclosure; DIY pouring drowns generic terminals in a sealed box.
DIY pouring still has a place: it stays economical and quick on a box that’s already installed and whose lid you never close again. I do it with the Magic Gel in bottles, never with a cartridge from which I can’t get a reliable coating.
I also remind you of the basic practice for outdoor boxes: drill one or two drainage holes at the bottom to let condensation out. On a buried box, that’s impossible — and that’s where the gel or a pre-filled enclosure really comes into its own.
Raytech doesn’t publish a list price for the Little Joint L range: the price must be requested from a trade distributor or via a quote. The formats range from the Barney (2 × 2,5 mm²) to the Tom (5 × 16 mm²), by way of the Betty/4 from the test (5 × 4 mm²) and the Betty/6 (5 × 6 mm²).
The Betty 4 is priced per connection: that’s its main cost, to be set against a DIY pouring that requires a box, gel and manual work. For a single buried joint, the extra cost is justified; for ten joints, the bill adds up fast.
The complete installation of an outdoor circuit, meanwhile, is costed elsewhere: the guide to installing an outdoor garden socket covers the location, the circuit and the tests before commissioning.
The Little Joint L range reads like a grid: first the number of conductors to connect, then the cross-section, and finally the cable diameter. The three criteria are checked before purchase, in that order.
For a simple incoming supply, the Barney or the Fred are enough. As soon as four or five conductors are involved, the Dino or Betty boxes take over: the Betty/4 from the test covers five conductors in 4 mm², the Betty/6 steps up one notch in cross-section.
The diameter often decides the choice. A cable bigger than the box’s range must not be forced: the cable gland no longer grips properly. So I open the range as a table before ordering, to choose on the actual cross-section and diameter.
I move up to the next box size as soon as the cable reaches the top edge of the range, or as soon as a fifth conductor shows up. A wider box is more comfortable to work with, and the gel keeps material around each terminal.
Conversely, I don’t oversize for comfort: a box that is too wide for the cable centres less well in the trench and takes up space for nothing. The right reference is still the one whose range matches the cable installed.
The screw terminal block offers a contact I can trace terminal by terminal, tightened with a screwdriver. The connector block suits when I want to group several conductors together or redo the joint without touching the fixed part of the connector. Both fit in the Fred’s gel.
My criterion comes down to the number of interventions planned. A joint that will be reopened to add a spur is prepared with a connector block, even if it means re-tightening at every visit. A permanent joint goes to the screw terminal block, tightened once and then buried in the gel.
The Betty 4 is for anyone who wants a watertight junction installed once, with no arguing: garden lighting, power for a path, a terrace feed. IP68 covers continuous immersion and buried use, IP69K high-pressure jets near a pool or a watering system.
Before buying, check two things: the conductor cross-section (max 5 × 4 mm²) and the cable diameter (10 to 16 mm). A cable outside the range cannot be forced into a cable gland: that’s the product’s dimensional limit, not an installation fault.
The housing is worked with a screw terminal block or a connector block: the difference shows when it is opened, before closing over the gel.
Outdoor work is still governed by the Obligation local wiring regulations : equipment rated at least IP24, R2V cable, 30 mA residual current device upstream.
The connector protects the junction, it replaces none of these requirements.
Near a pool, exposure to water changes the game: the rules of pool electrics set out the zones and the ratings to respect. A wet connection remains the classic scenario of the 30 mA circuit breaker that trips when it rains.
For a buried cable, installation follows the depth and warning mesh rules detailed on the buried R2V cable without conduit.
For a provision that is not connected, a watertight box or an outdoor DCL base remains the rule, as the guide to the DCL box in renovation points out.
To sum up: for a junction to be buried or immersed, the Betty 4 does the job without preparation and without any certification to obtain yourself; for a junction box that you want to reopen and measure, a home-made pour remains more flexible.
A buried junction is prepared at the end of the trench, cables laid and marked before opening the housing. I then keep the sachet and the gel away from the sand, on a clean cloth, during the connection.
The weather dictates the timing: in pouring rain, I postpone the opening. The housing is fitted onto dry cables, and I close it again as soon as tightening is finished, without leaving the cavity open between two round trips to the van.
You know its limits before installation: the range of cross-sections and the cable diameter. Outside these bounds, it is not the product that needs adapting, it is the reference that needs changing in the range.
Near a swimming pool or under sprinklers, the IP69K rating covers water jets, but the connector does not exempt you from any rule: protected circuit, power off before working, checking the 30 mA RCD before re-energizing.
I also recall the fundamental limit: the connector protects the junction, it does not make a cable suitable for everything. Burial depth, warning mesh and circuit protection remain matters of cable and distribution board.
On an occupied site, I secure the area before opening: circuit locked out, voltage tester within reach, nobody else on the circuit. An outdoor junction is treated like a distribution board, even if the lighting goes out a few meters away.
The Betty 4 reopens without being replaced, that is its selling point in the field. I never reopen an enclosure for nothing, but when the job takes me there, I take the opportunity to check the existing connection.
First the gel: I remove it with one hand, I put it back where it was, and I clean the surrounding area before closing, so as not to trap sand in the closure.
Then the terminal block screws. As I wrote above, this is the weak point of the product: at the slightest doubt, I redo the tightening with the screwdriver before closing, rather than leave again with a connection that has worked.
Finally the cable glands: I check that each cable is gripped over its entire circumference and that none has slipped. The check is done by pulling gently on the sheath, without forcing on the connection.
On the wear side, I look at the plastic and the seals before the terminals. A buried enclosure takes the pressure of the soil and tool strikes: I note its position on each visit so as not to stick a spade into it later.
When a seal looks marked to me, I replace the connector rather than count on tired sealing. Reopening makes it possible to recover the cables and prepare them again if the length allows.
After a watering season, I take a look at the enclosure when it is accessible, and I check the 30 mA residual current device at the panel at the same time.
The first mistake is forcing an entry: a cable outside the range, a cable gland pried apart with a screwdriver, and the whole thing no longer protects. The cable must enter without being forced and hold on its own in its passage.
The second comes down to stripping. Too short, and the conductor floats in the terminal; too long, and bare strands cross between two terminals. I strip to the length of the terminal, then pinch the strands to align them before inserting.
The third is opening the housing too early: it stays open on the edge of the trench while I look for the pliers, and dust sticks to the gel. I open it at the last moment, when everything else is ready.
Then comes forgetting the final check: powering back up without checking the tightening, without a visual check, without testing the 30 mA RCD. The circuit comes on, but the junction has not been validated. I make myself do the full round every time.
Last mistake: pinching a conductor under the cover, or closing it back up on a dirty seal. Both show up at the next reopening, and both are paid for in the first rainy season.
Speed excuses nothing: the installation is short, but every move keeps its place. What costs time is redoing a badly closed junction, not taking a little more time on the tightening.
And circuit identification is prepared at the panel, not at the end of the cable: I note the relevant circuit on the lockout, and I find it again when powering back up.
Verdict on the Betty 4
The Betty 4 is a pre-filled waterproof connector: IP68 and IP69K officially tested by IMQ (CEI EN 50393), pre-filled non-toxic gel, a Fred screw-type or connector-block terminal, installation in two minutes and re-accessibility claimed by Raytech. I recommend it for a buried or submerged junction, with a price per connection that you have to ask for at a wholesaler. The only technical regret: the connection relies on screw terminal blocks that loosen over time — hence the score of 3,75/5.
4 questions
InteractiveBetty 4 or classic box: your waterproof junction
4 questions to guide your choice
Select the closest situation
3 questions
InteractiveQuiz: the Raytech Betty 4 waterproof connector
3 questions to check the essentials
Choose an answer
It is a micro-joint pre-filled with gel from the Little Joint L range: 145 × 46 × 35 mm, capacity 5 × 4 mm² maximum, for cables from 10 to 16 mm in diameter. It comes with its grey Fred IP68 connector (white screw terminal block, also usable as a connector block), and closing it drowns the connection in gel. Installation takes about two minutes: you connect, you close, you check the cable glands.
Yes, unlike gels alone: the Betty 4 is officially tested by the IMQ for IP68 (continuous immersion) and IP69K (high-pressure and high-temperature jet), with IEC EN 50393 compliance where applicable. Raytech gels, for their part, claim IP68 in a suitable enclosure, with no certification standard cited. This is the central difference between the tested enclosure and DIY potting.
Raytech claims it is always re-enterable ("always re-enterable"): you reopen the enclosure, the gel comes away easily, you work on the terminal, then close it again over the gel. Unlike a box flooded with resin, which is irreversible, or DIY potting where putting it back does not restore a reliable seal, nothing has to be renewed here.
Yes, that is its preferred use: IP68 covers continuous immersion and buried use, IP69K covers high-pressure jets, for example near a pool or an irrigation system. The enclosure is designed for the crushing of a buried installation, whereas pouring gel into a surface box only protects against moisture. For the cable itself, the depth and warning mesh rules remain those of the buried R2V.
Raytech does not publish a public price: the price has to be requested from a trade distributor or on a quote. The product is paid for per connection, with a pre-filled and tested enclosure — to be set against DIY potting, which requires a box, gel and labour.
The Betty 4 is a pre-filled, IMQ-tested enclosure, ready to install, always re-enterable, designed for burial and immersion. DIY potting drowns generic terminals in a sealed box: economical and fast on a box that is already installed, but not certified, and putting the gel back does not restore a reliable seal. For a junction installed once and forgotten, the Betty 4 is the obvious choice; for a box that will be reopened, DIY potting remains more flexible.
Disclosure Raytech : Betty 4 connector.

Théo Desrousseaux
Electrician and editor
I work in the field and edit this magazine. Every guide is reviewed for its target country before publication.
Practical electrical installation guides, diagnostic methods and tool recommendations compared against the technical wiring standards of this national edition.
What is the best multimeter for electricians in the UK? Compare the Fluke 87V, Fluke 117, Klein MM700 and Brymen BM235, with prices, CAT ratings and True RMS.
Read the guide Guide RCBO vs RCD difference UK consumer unit What is the difference between an RCBO and an RCD? Learn what each device protects, why RCBOs trip less, the cost in the UK, and which to choose. Read the guide Guide RCD keeps tripping causes Why does an RCD keep tripping? Learn the common causes, the 30 mA threshold, the six-month test rule, and how to diagnose the fault safely. Read the guide
  Guide Ring main circuit wiring UK BS 7671 How does a UK ring main circuit work? Learn the BS 7671 433.1.204 rule, the 100 m² limit, the 32 A protection, spurs, and how the circuit is wired. Read the guide